Wymiana centralnego nawiewu / Replacing central vent
No cóż, mnie ten środkowy nawiew tylko wqrzał. Nie korzystałem z tego, a brakowało mi miejsca na chociażby telefon komórkowy. Na szczeście okazało się, że nawiew można zamienić na bardziej użyteczną półkę. Z tego co się orientuje jest to możliwe tylko w samochodach bez dwustrefowej klimy, bo dwustrefowa klima wykorzystuje czujnik temperatury umieszczony w centralnym nawiewie.
Części: Półka z gumowym wkładem - 1K0 857 921 C 1QB
Narzędzia: śrubokręt Torx T20, "psia kość"
Czas: 20 minut
---
Well, for me the whole idea of the central vent was annoying. I did not use it, moreover I was missing some storage space. Fortunately, I found out it was possible to turn the useless vent into usefull storage shelf. Based on my knowledge it is possible only in the cars without dual zone air-con, since it uses the temperature sensor built-in into the central vent.
Parts: Storage shelf with rubber insert - 1K0 857 921 C 1QB
Tools: screwdriver Torx T20, dog-bone
Time: 20 minutes
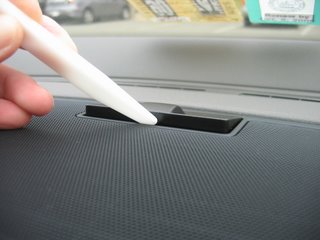
1. Wyjęcie czujnika temperatury / Removal of the temperature sensos
* * *

* * *
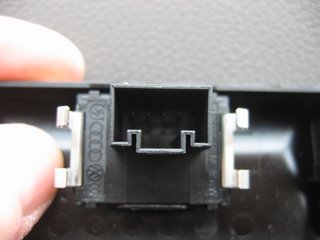
Jak widać czujnik temperatury jest. Tyle, że nie podłączony. / There is a temeperature sensor. However, it is not connected.
* * *
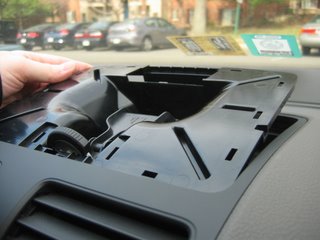
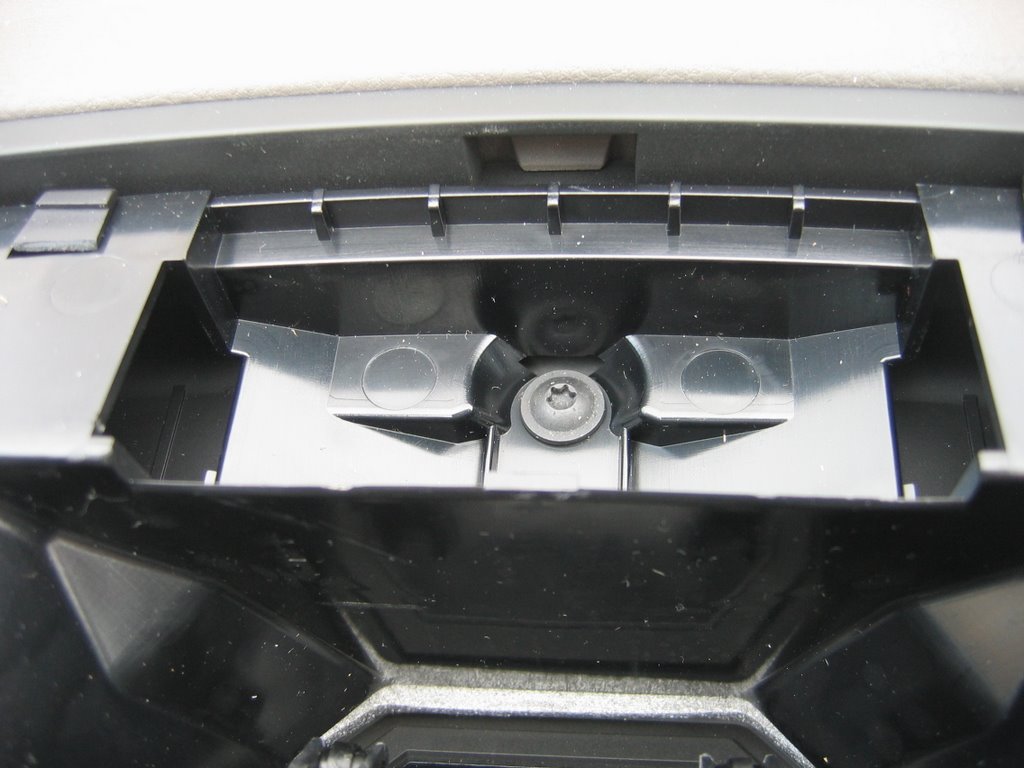
2. Wyjęcie perforowanej osłony / Removal of grill
Ten krok jest niepotrzebny, a wręcz niezalecany. Człowiek uczy się jednakowoż na błędach :-). Osłona jest zamontowana na kilku zaczepach. Mnie się udało złamać dwa. / This step is not required and not recommended. But you learn from your own mistakes :-). The grill is attached using few latches. I have broken two of them.

* * *

Tak wygląda wnętrze nawiewu. / Inside the central vent.
* * *
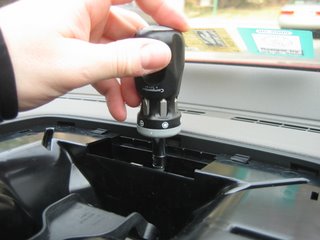
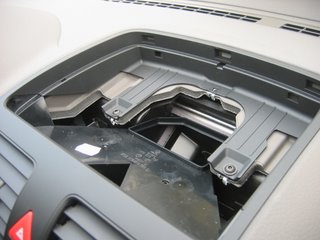
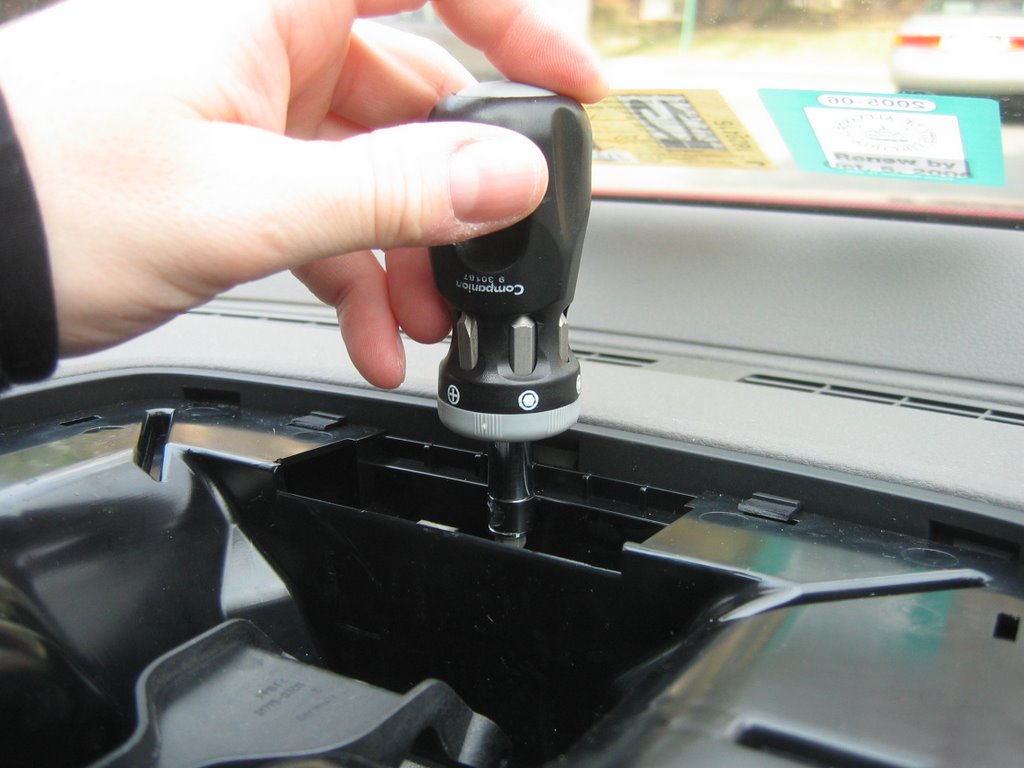
3. Wyjęcie nawiewu / Removal of the vent
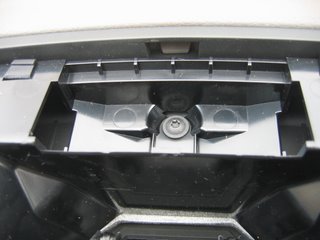
Nawiew jest przymocowany jedną śrubą, umieszczoną pod czujnikiem temperatury. / The vent is attached with this bolt, lcated under the temperature sensor.
* * *
* * *
* * *
* * *
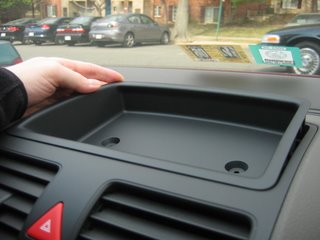
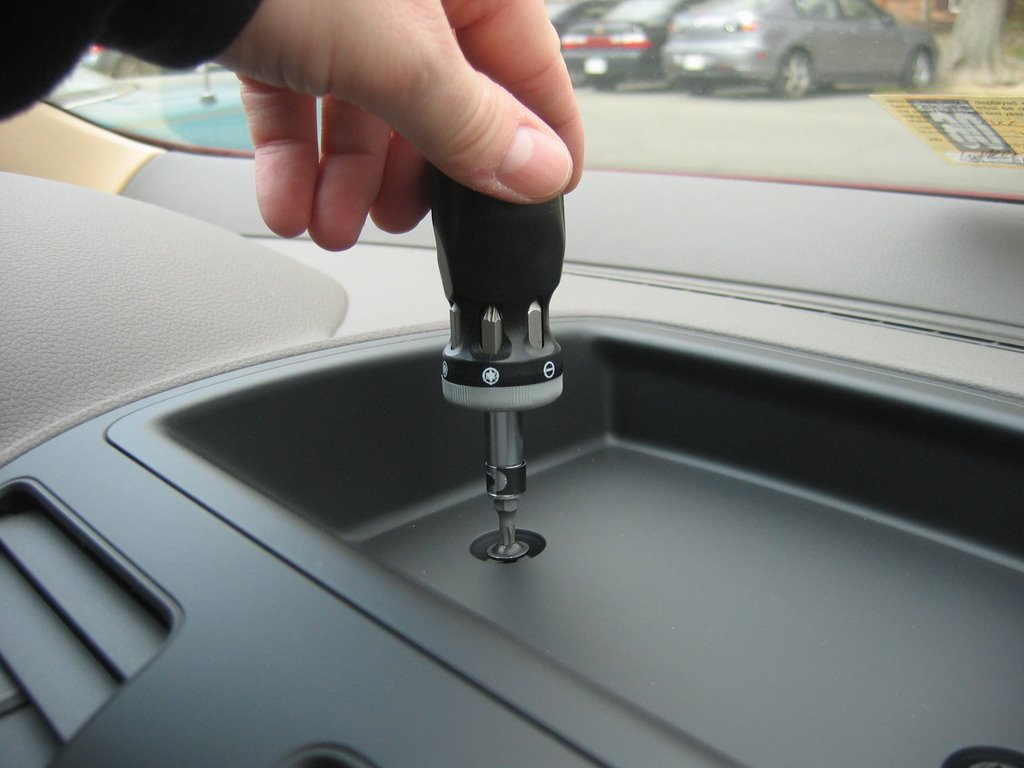
4. Instalacja półki / Mounting the shelf

Najpierw trzeba odkręcić śruby, którymi półka będzie zamocowana. Swoją drogą, zdecydowałem się na wkręcenie śruby, która mocowała nawiew z powrotem, bo nie chciałem, żeby mi coś zaczęło potem latać w środq i grzechotać. / First, it is necessary to unbolt the screws attaching the shelf. BTW, I have bolted the screw that mounted the vent, because I did not want anything to rattle inside the dash.
* * *
* * *

* * *
* * *

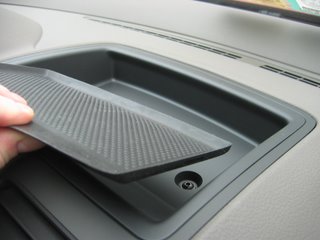
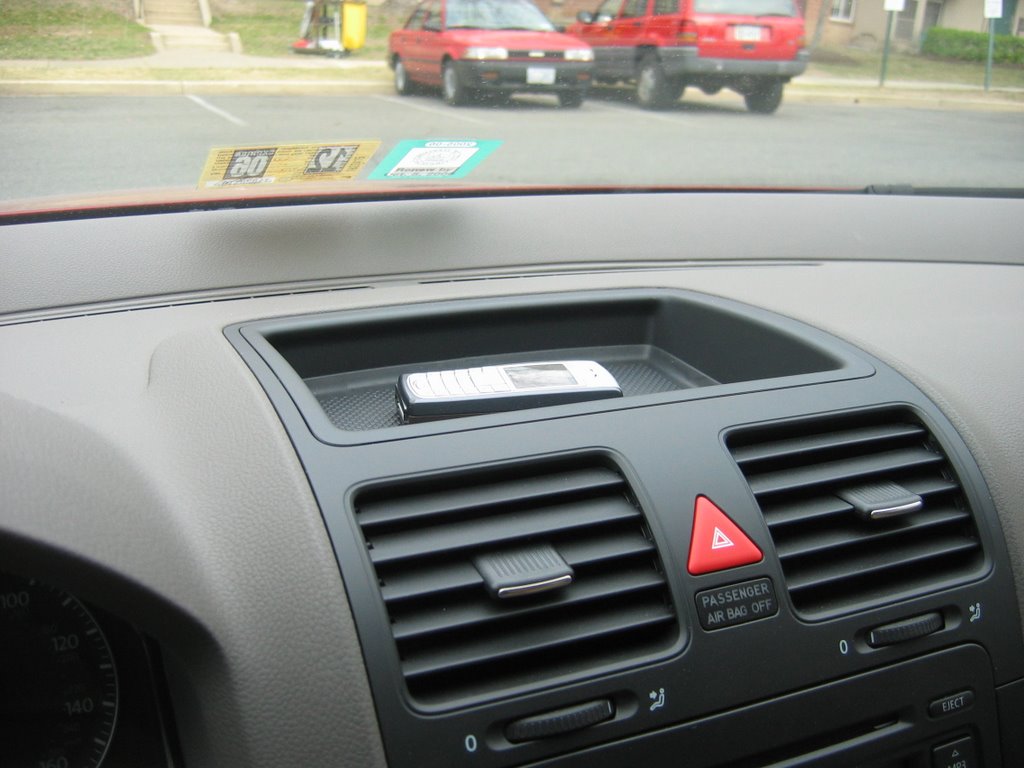
Po. Swoją drogą ciekawą sprawą jest fakt, że jeżdżąc w nocy widzę na szybie odbicie wyświetlacza z komórki i wiem kto dzowni :-). / After. BTW interesting thing is that when I drive when it is dark, I can see the reflex of the cell display on the windshield, so I know who is calling :-).
Części: Półka z gumowym wkładem - 1K0 857 921 C 1QB
Narzędzia: śrubokręt Torx T20, "psia kość"
Czas: 20 minut
---
Well, for me the whole idea of the central vent was annoying. I did not use it, moreover I was missing some storage space. Fortunately, I found out it was possible to turn the useless vent into usefull storage shelf. Based on my knowledge it is possible only in the cars without dual zone air-con, since it uses the temperature sensor built-in into the central vent.
Parts: Storage shelf with rubber insert - 1K0 857 921 C 1QB
Tools: screwdriver Torx T20, dog-bone
Time: 20 minutes
1. Wyjęcie czujnika temperatury / Removal of the temperature sensos

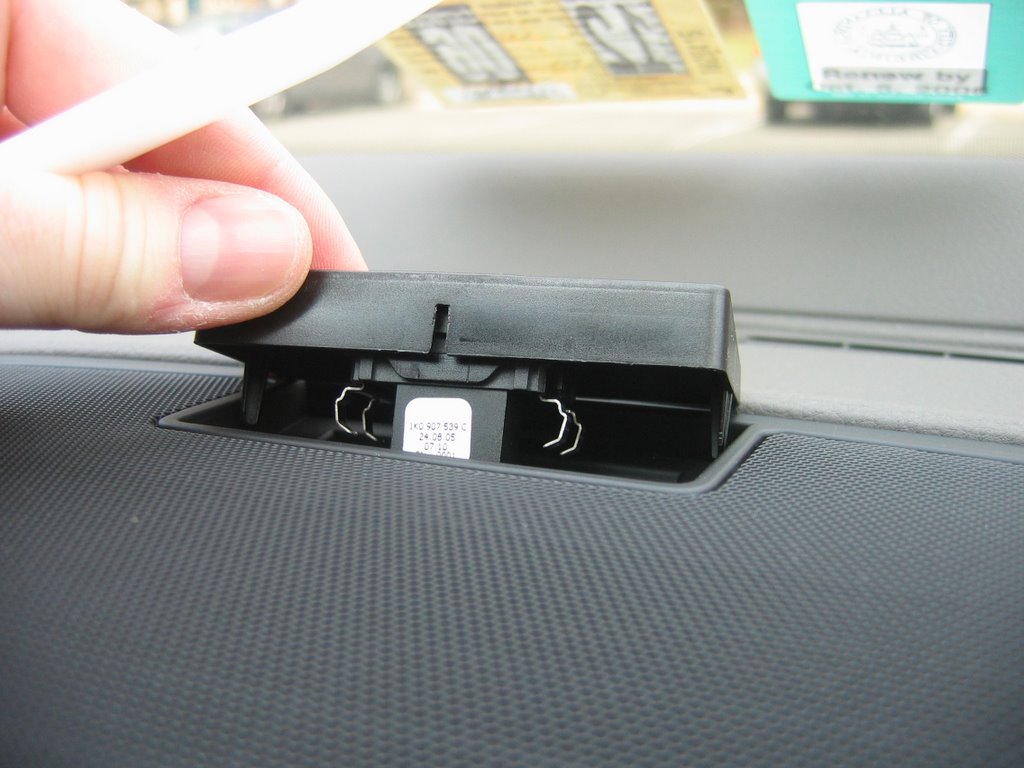
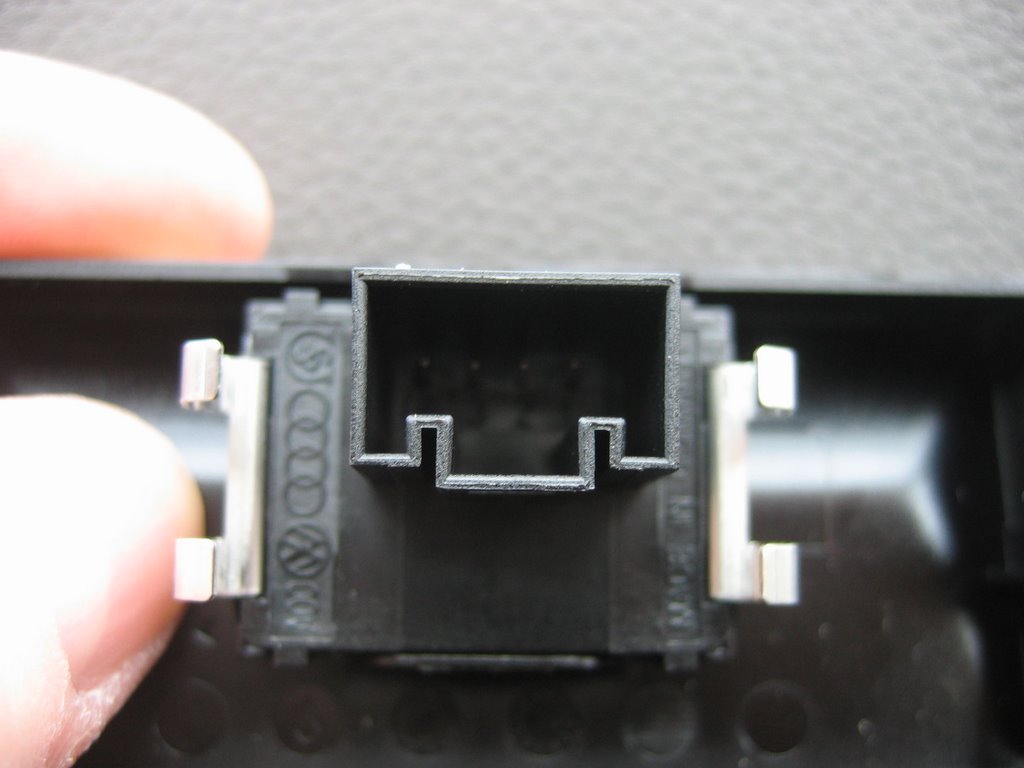
Jak widać czujnik temperatury jest. Tyle, że nie podłączony. / There is a temeperature sensor. However, it is not connected.
2. Wyjęcie perforowanej osłony / Removal of grill
Ten krok jest niepotrzebny, a wręcz niezalecany. Człowiek uczy się jednakowoż na błędach :-). Osłona jest zamontowana na kilku zaczepach. Mnie się udało złamać dwa. / This step is not required and not recommended. But you learn from your own mistakes :-). The grill is attached using few latches. I have broken two of them.


3. Wyjęcie nawiewu / Removal of the vent
Nawiew jest przymocowany jedną śrubą, umieszczoną pod czujnikiem temperatury. / The vent is attached with this bolt, lcated under the temperature sensor.


4. Instalacja półki / Mounting the shelf

Najpierw trzeba odkręcić śruby, którymi półka będzie zamocowana. Swoją drogą, zdecydowałem się na wkręcenie śruby, która mocowała nawiew z powrotem, bo nie chciałem, żeby mi coś zaczęło potem latać w środq i grzechotać. / First, it is necessary to unbolt the screws attaching the shelf. BTW, I have bolted the screw that mounted the vent, because I did not want anything to rattle inside the dash.


Po. Swoją drogą ciekawą sprawą jest fakt, że jeżdżąc w nocy widzę na szybie odbicie wyświetlacza z komórki i wiem kto dzowni :-). / After. BTW interesting thing is that when I drive when it is dark, I can see the reflex of the cell display on the windshield, so I know who is calling :-).
Wujek Zdzisek z Ameryki wysłał o / posted at 4:59 PM
komentarzy / comments: 1
![]()
![]()
The part is from dealership. And the reason why it is not recommended for dual-temp is the sunlight sensor.
and no, no more rattle.
Prześlij komentarz
<< Powrót / Close