Schowek kierowcy / Dash Cubby
Potrzebne narzędzia:
1. śrubokręt TORX T20,
2. Klucz M10 (najlepiej płaski i nasadkowy)
3. coś do podważania plastików (tu się to nazywa dog-bone, czyli psia kość :-).
Potrzebny czas: około 1 godziny
---
Tools required:
1. Screwdriver TORX T20,
2. Wrench M10 (both flat and top mounted)
3. trim removal wedge (dog-bone),
Time required: about 1 hour
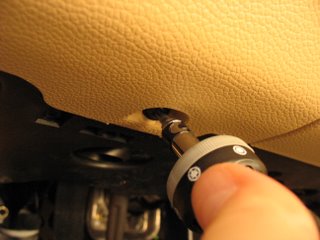
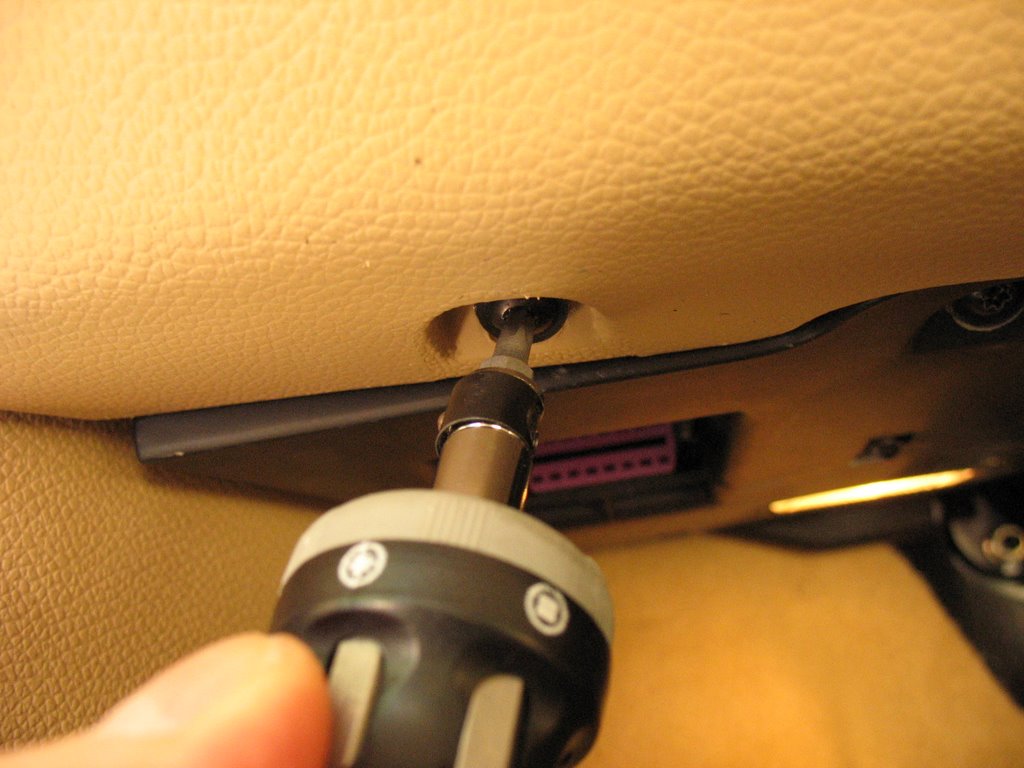
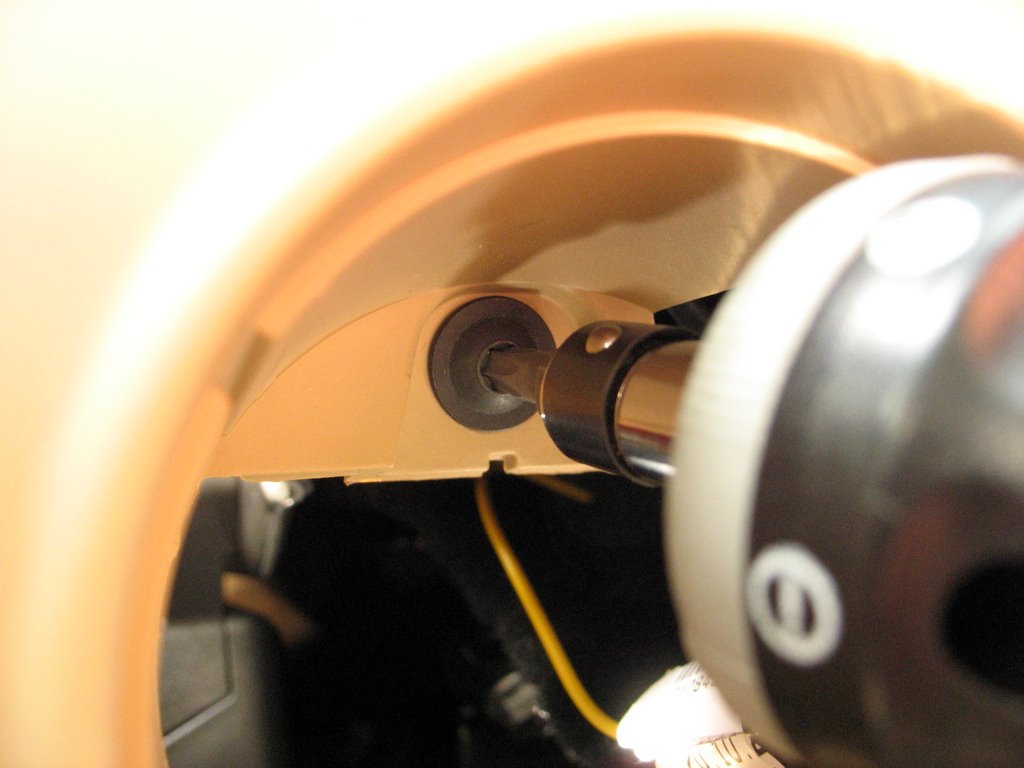
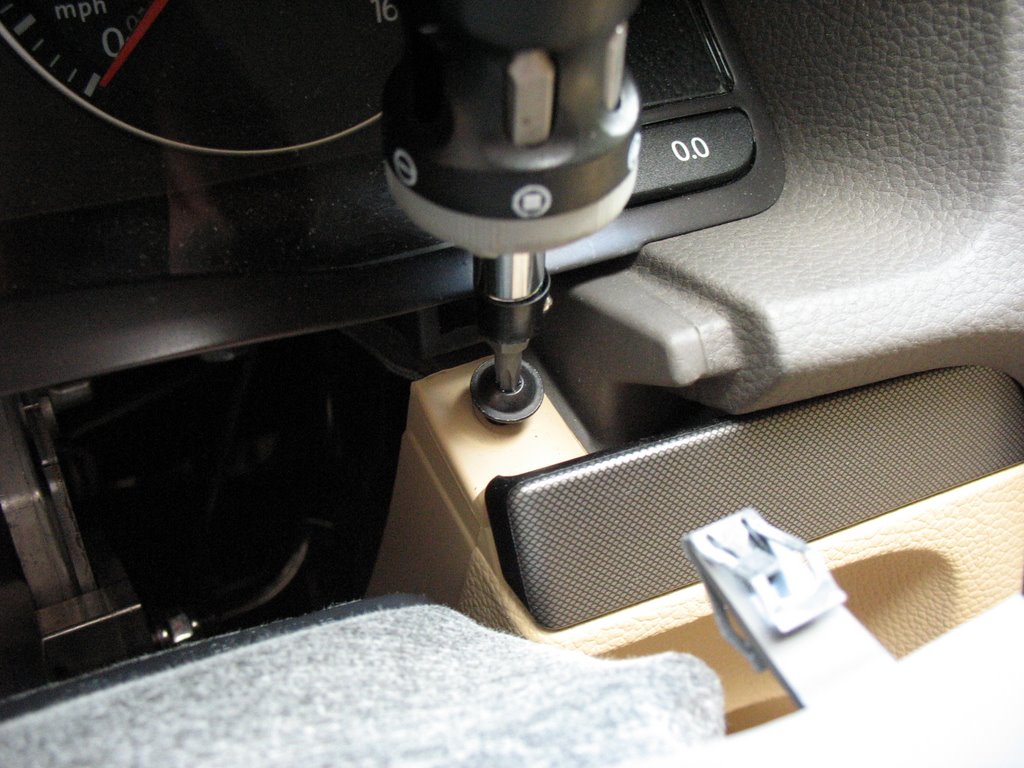
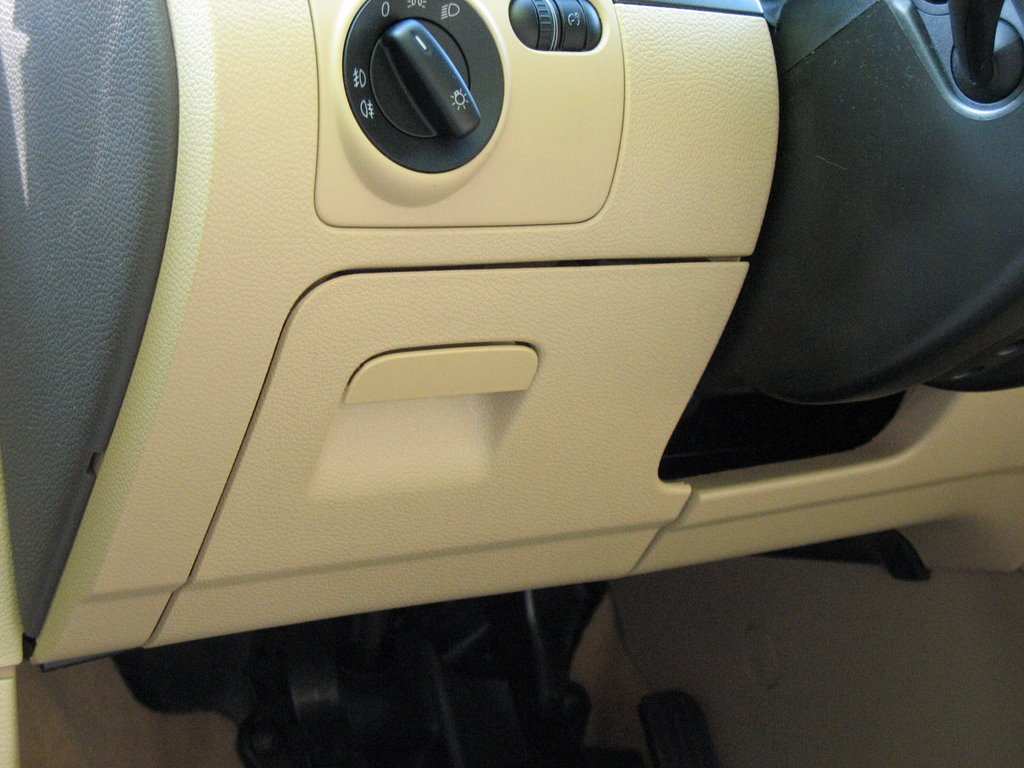
Originalny panel po lewej stronie kierownicy przymocowany jest na czterech śrubach: dwie od spodu, jedna pod włącznikiem świateł i jedna pod listwą ozdobną przy wskaźnikach:
---
The standard dash panel on the left side of the wheel is attached with four bolts: two from the bottom, one under the light switch and one under the trim by the cluster:


* * *
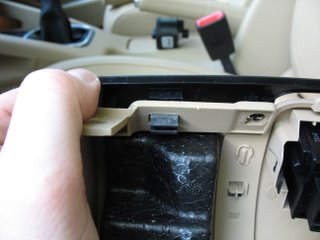
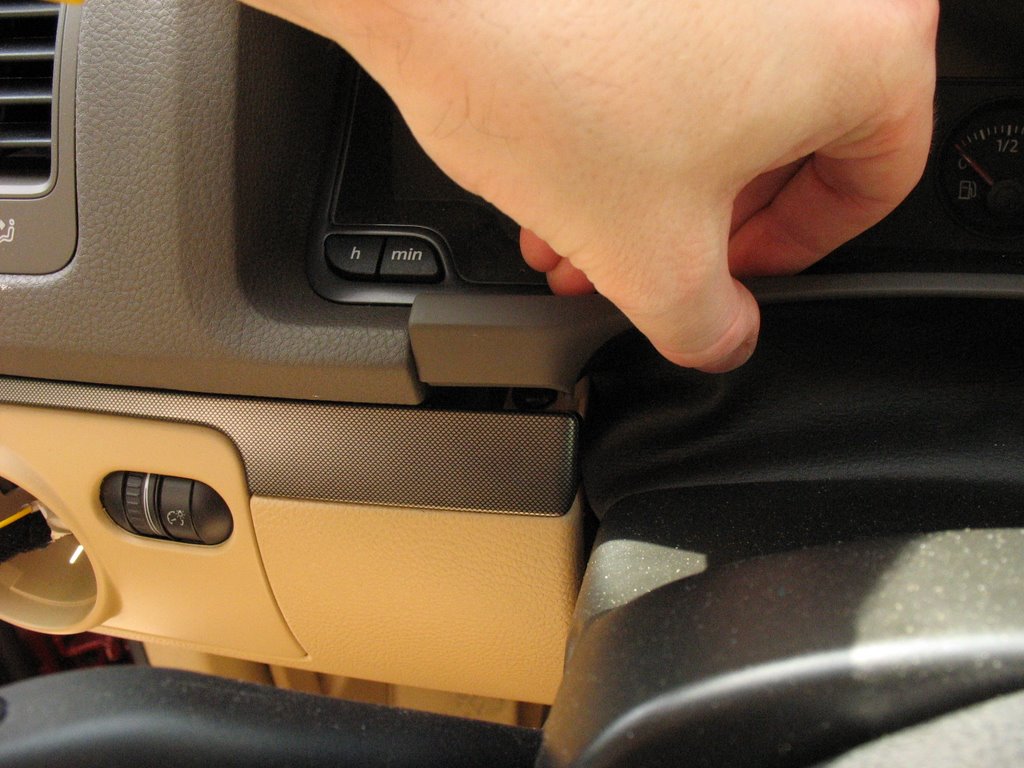
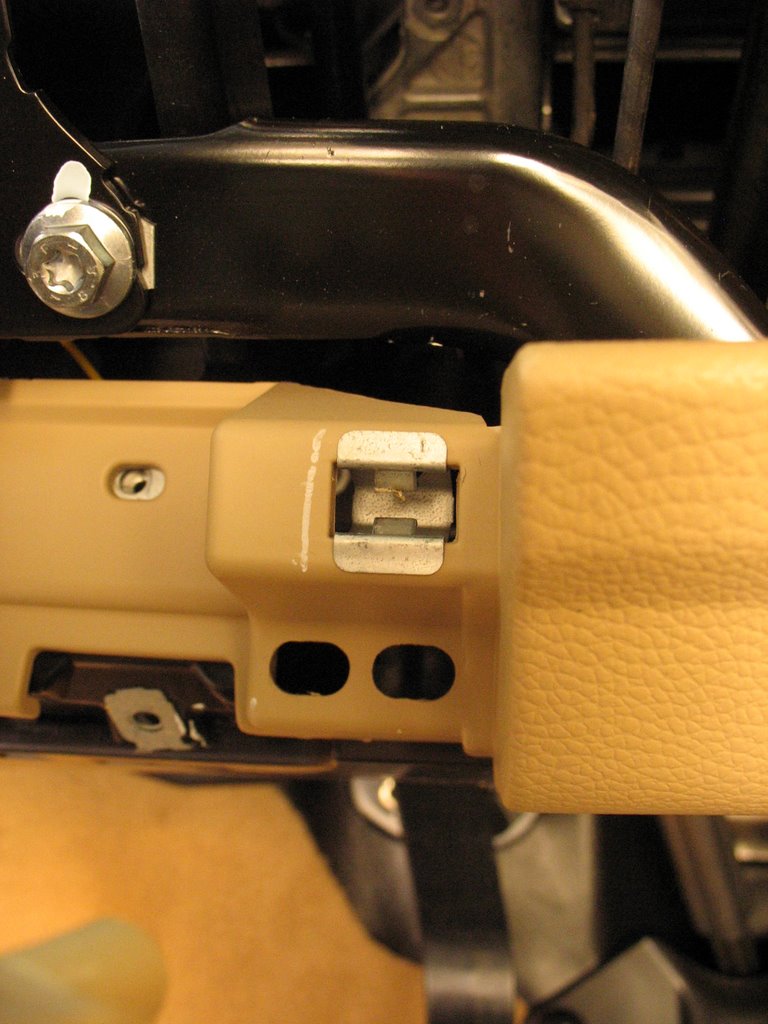
Dodatkowo w prawej dolnej cześci znajduje się jeden zatrzask. / Additionally, in the lower right part there is a clip.

* * *
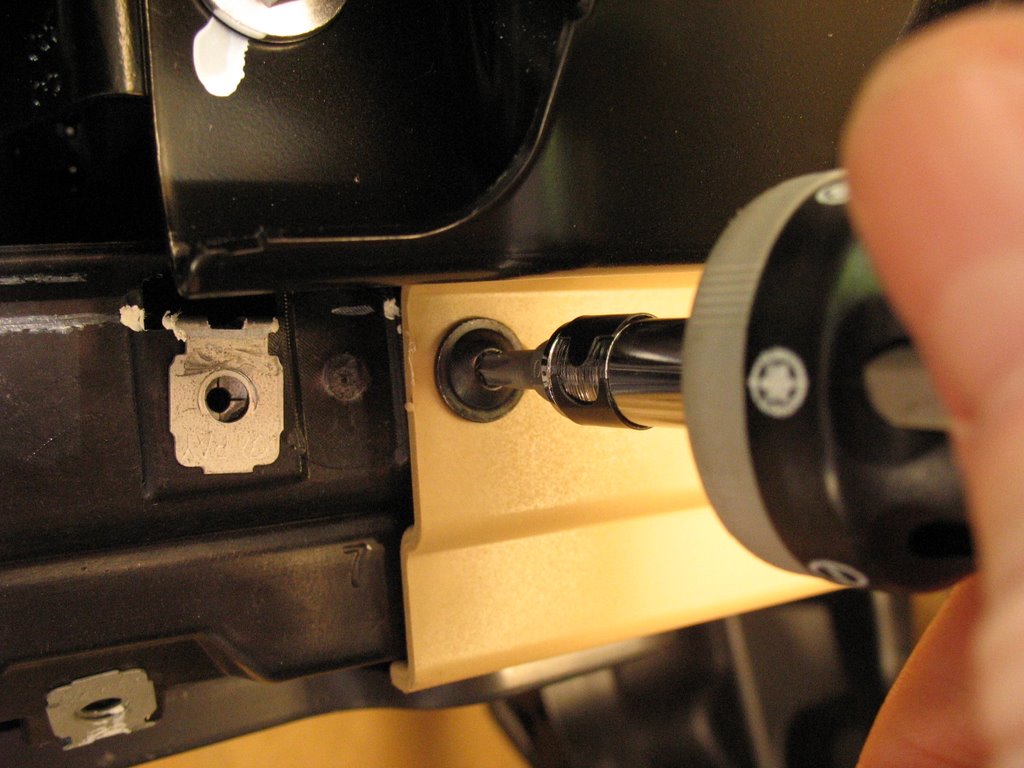
Następnie należy poluzować panel po prawej stronie kierownicy. Wystarczy odkręcić trzy śruby: jedna pod listwą ozdobną przy wskaźnikach, jedna od spodu i jedna pod właśnie zdjętym lewym panelem. Nie ma potrzeby zdejmowania panelu.
---
Nest step is to loosen the right side dash panel. There are three bolts: one under the trim by the cluster, one from the bottom, and one under the left side dash panel. There is no need to fully remove the panel.


* * *
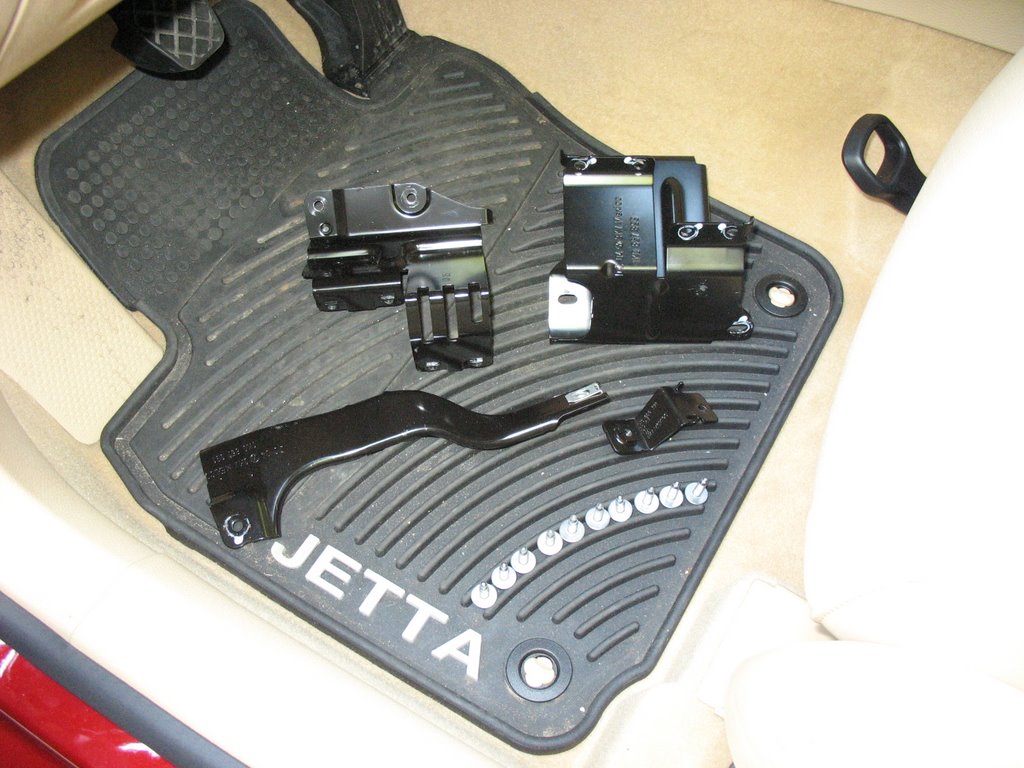
Kolejny krok to usunięcie czterech metalowych elementów. Nie wiem po kiegu grzyba wogóle są zamontowane, bo nic do nich nie jest faktycznie przymocowane.
---
Nest step is to remove four metal elements. I have no clue what is the purpose as there is nothing attached to these parts.

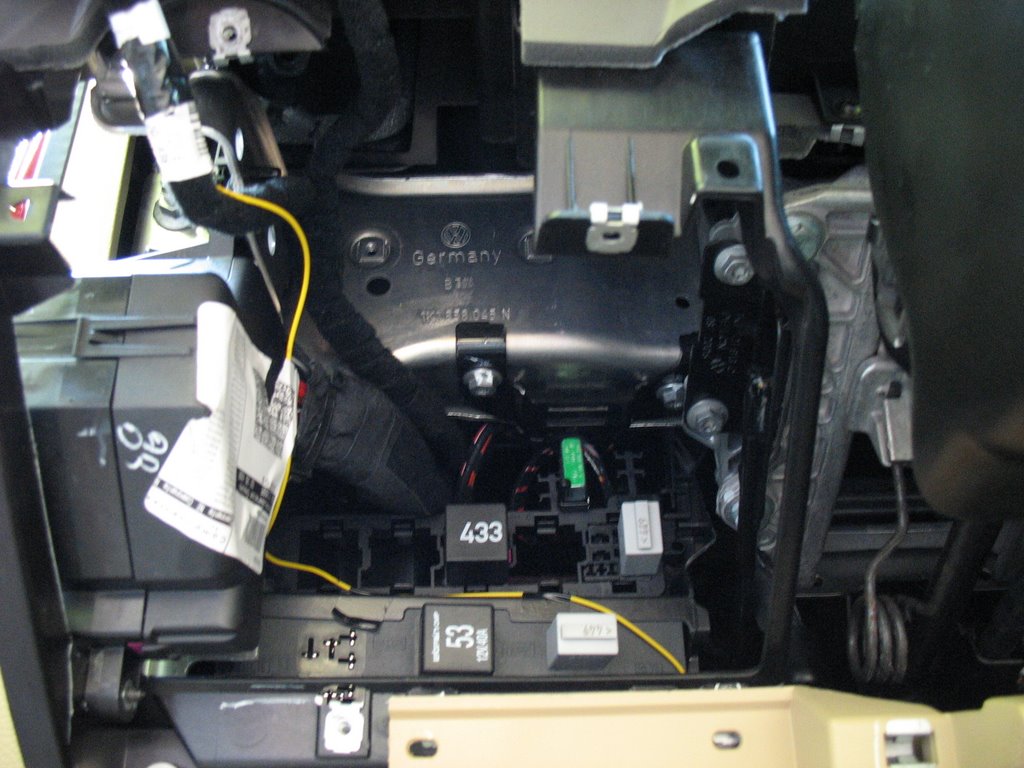
Należy odkręcić dziesięć śrub M10: dwie u góry (na moim zdjęciu nad żółtym kablem wyzwalającym tylne światło przeciwmgielne), sześć poniżej...
---
It is necessary to remove ten M10 bolts: two on the top (at my picture over the yellow trigger fog cable), six below...

...jedną pod skrzynką bezpieczników... / ...one below the fuse box...

...i jedną pod prawym panelem. / ...and one under the right dash panel.
* * *
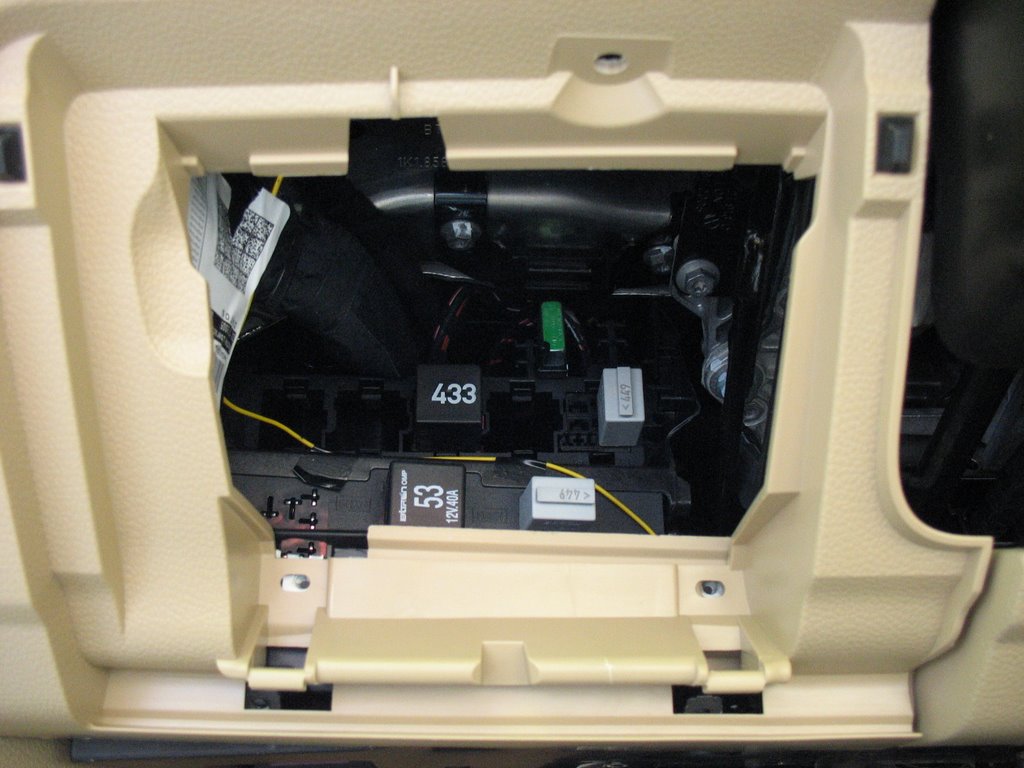
Po wymontowaniu mamy dostęp do centralnego kontrolera elektroniki i przekaźników. / After removal there is an access to the central electronics controller and relays.

* * *
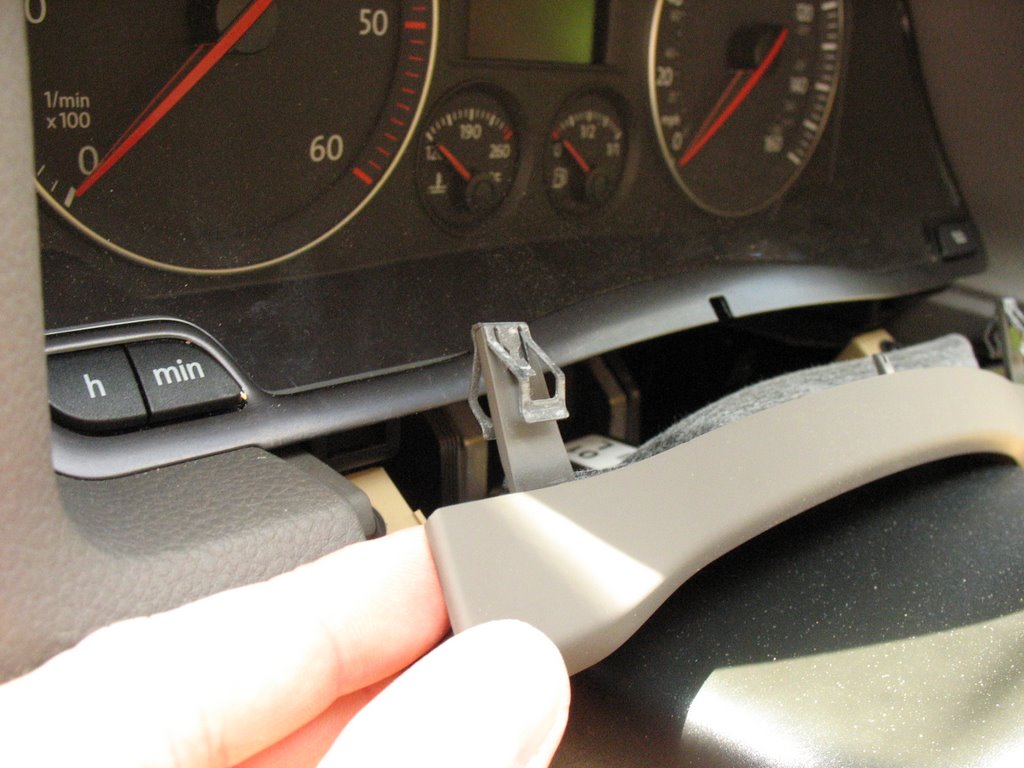
Ze starego panelu odzyskujemy listwę ozdobną i potencjometr jasności oświetlenia wskaźników.
---
From the old dash panel we need to recover a trim and rheostat.

* * *
Nowy panel mocowany jest w dolnej częście TRZEMA (a nie dwoma) śrubami. Ponieważ nie miałem pod ręką takiej śruby, postanowiłem użyć jednej z trzech mocujących panel prawy. Lewy panel i tak jest częściowo mocowany na panelu prawym, więc nie spodziewam się żadnego grzechotania.
---
New panel is attached with THREE (not two) on the lower part. As I did not have a spare bolt available, I decided to use one of those used for right side panel, as it is partially mounted under the left side panel. Therefore, I do not expect any rattling.

* * *

Pozostałości / Left-overs
* * *

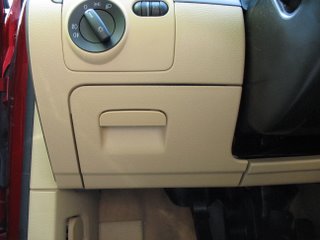
Po / After
* * *
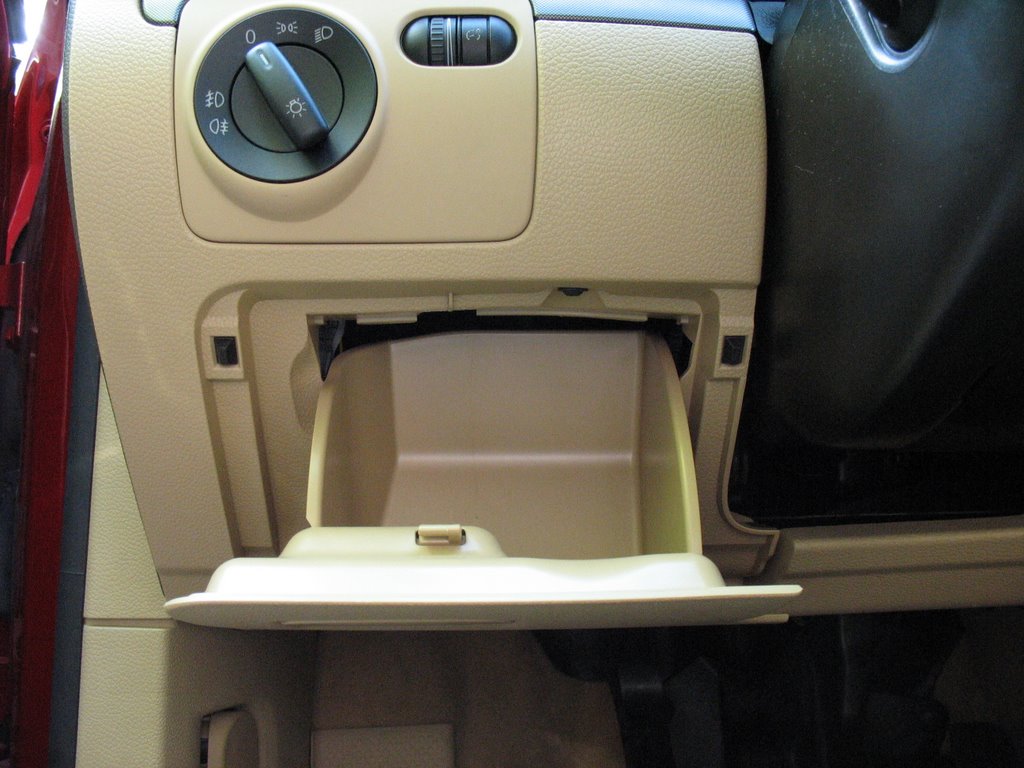
Schowek jest dosyć przyzwoitych rozmiarów. Mogę do niego schować np. kompaktowy aparat fotograficzny, który lubię mieć zawsze przy sobie. Pierwotnie schowek był qpiony na drobniaki potrzebne na bramkach. Jednak zrezygnowałem z tego pomysłu, bo schowek nie posiada gumowej wyściółki i drobniaki mogłyby za bardzo dzwonić.
---
The cubby is of a pretty decent size. I can easily put in a compact camera there, which I like to have handy. Initially cubby was bought to keep the change for the highway boots, but I decided not to keep money inside as there is no rubber insert in the cubby and coins tend to rattle inside.

* * *
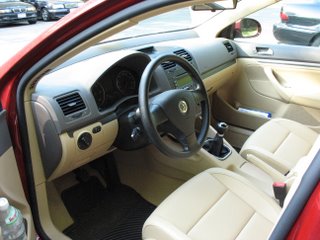
Wnętrze samochodu. Jedną z rzeczy, która jest wg wyjątkowo użyteczna są uchwyty na drzwiach, gdzie mogę upchnąć pokaźną butlę wody mineralnej.
---
Inside the car. One of the things I really like about it are those huge moldings in the door trim that I can keep 1.5l bottle of mineral water.
1. śrubokręt TORX T20,
2. Klucz M10 (najlepiej płaski i nasadkowy)
3. coś do podważania plastików (tu się to nazywa dog-bone, czyli psia kość :-).
Potrzebny czas: około 1 godziny
---
Tools required:
1. Screwdriver TORX T20,
2. Wrench M10 (both flat and top mounted)
3. trim removal wedge (dog-bone),
Time required: about 1 hour
Originalny panel po lewej stronie kierownicy przymocowany jest na czterech śrubach: dwie od spodu, jedna pod włącznikiem świateł i jedna pod listwą ozdobną przy wskaźnikach:
---
The standard dash panel on the left side of the wheel is attached with four bolts: two from the bottom, one under the light switch and one under the trim by the cluster:


Dodatkowo w prawej dolnej cześci znajduje się jeden zatrzask. / Additionally, in the lower right part there is a clip.
Następnie należy poluzować panel po prawej stronie kierownicy. Wystarczy odkręcić trzy śruby: jedna pod listwą ozdobną przy wskaźnikach, jedna od spodu i jedna pod właśnie zdjętym lewym panelem. Nie ma potrzeby zdejmowania panelu.
---
Nest step is to loosen the right side dash panel. There are three bolts: one under the trim by the cluster, one from the bottom, and one under the left side dash panel. There is no need to fully remove the panel.

Kolejny krok to usunięcie czterech metalowych elementów. Nie wiem po kiegu grzyba wogóle są zamontowane, bo nic do nich nie jest faktycznie przymocowane.
---
Nest step is to remove four metal elements. I have no clue what is the purpose as there is nothing attached to these parts.

Należy odkręcić dziesięć śrub M10: dwie u góry (na moim zdjęciu nad żółtym kablem wyzwalającym tylne światło przeciwmgielne), sześć poniżej...
---
It is necessary to remove ten M10 bolts: two on the top (at my picture over the yellow trigger fog cable), six below...

...jedną pod skrzynką bezpieczników... / ...one below the fuse box...

...i jedną pod prawym panelem. / ...and one under the right dash panel.
Po wymontowaniu mamy dostęp do centralnego kontrolera elektroniki i przekaźników. / After removal there is an access to the central electronics controller and relays.
Ze starego panelu odzyskujemy listwę ozdobną i potencjometr jasności oświetlenia wskaźników.
---
From the old dash panel we need to recover a trim and rheostat.


Nowy panel mocowany jest w dolnej częście TRZEMA (a nie dwoma) śrubami. Ponieważ nie miałem pod ręką takiej śruby, postanowiłem użyć jednej z trzech mocujących panel prawy. Lewy panel i tak jest częściowo mocowany na panelu prawym, więc nie spodziewam się żadnego grzechotania.
---
New panel is attached with THREE (not two) on the lower part. As I did not have a spare bolt available, I decided to use one of those used for right side panel, as it is partially mounted under the left side panel. Therefore, I do not expect any rattling.
Schowek jest dosyć przyzwoitych rozmiarów. Mogę do niego schować np. kompaktowy aparat fotograficzny, który lubię mieć zawsze przy sobie. Pierwotnie schowek był qpiony na drobniaki potrzebne na bramkach. Jednak zrezygnowałem z tego pomysłu, bo schowek nie posiada gumowej wyściółki i drobniaki mogłyby za bardzo dzwonić.
---
The cubby is of a pretty decent size. I can easily put in a compact camera there, which I like to have handy. Initially cubby was bought to keep the change for the highway boots, but I decided not to keep money inside as there is no rubber insert in the cubby and coins tend to rattle inside.


Wnętrze samochodu. Jedną z rzeczy, która jest wg wyjątkowo użyteczna są uchwyty na drzwiach, gdzie mogę upchnąć pokaźną butlę wody mineralnej.
---
Inside the car. One of the things I really like about it are those huge moldings in the door trim that I can keep 1.5l bottle of mineral water.
Wujek Zdzisek z Ameryki wysłał o / posted at 8:25 PM
komentarzy / comments: 1
![]()
![]()
"Nest step is to remove four metal elements. I have no clue what is the purpose as there is nothing attached to these parts".
They could have been required to stiffen the dash for crash safety?
dschein
Prześlij komentarz
<< Powrót / Close