20k (Swonick)
W ostatni weekend robiłem przegląd na 20 tysięcy mil w Swonicku: wymiana oleju i filtra, wymiana filtra paliwa, wymiana filtra przeciwpyłkowego kabiny i przełożenie kół tył-przód.
Tym razem poszedłem po rozum do głowy i poluzowałem śruby od kół, zanim jeszcze podniosłem samochód do zmiany oleju :-). Przydało się przy przekładce kół.
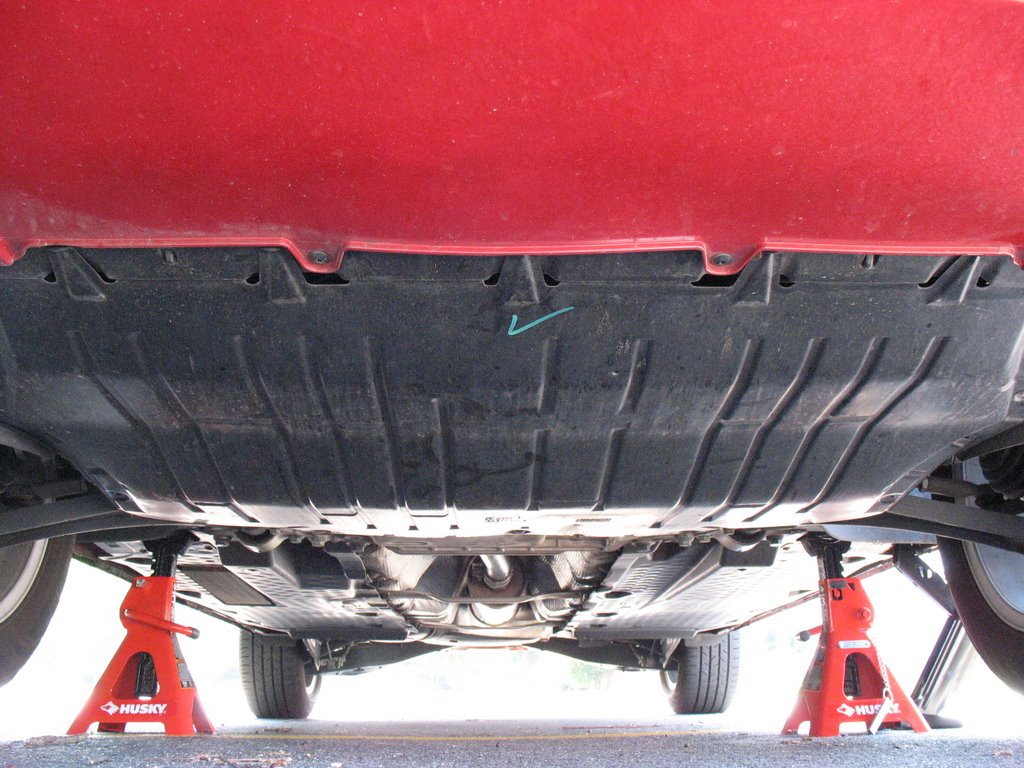
Ponieważ w naszej ostatniej podróży po Stanach przejechaliśmy po pozostałościach z opony ciężarówki byłem ciekawy czy nie ma żadnych uszkodzeń od spodu. Na szczęście VW z silnikami TDI mają dosyć pancerne zabezpieczenie od spodu (dłuższe niż benzyniaki, przynajmniej tak było w Mk4), którego zadaniem jest również tłumienie hałasu. W związku z tym nie zauważyłem żadnych uszkodzeń.
---
Last weekend I did my 20k miles maintenance service in Swonick: oil change, oil filter change, fuel filter change, pollen cabin filter change and wheel rotation.
This time I was wiser and I loosen the wheel bolts before I lift the car for oil change :-). Good idea if you plan the wheel rotation.
During our last trip around US we drove over the piece of truck tyre left on the road, so I was curious if there were any damages. Fortunately, TDIs are equipped with the big stron belly pan (bigger then in gassers, at least in Mk4), whish is also responsible for noise insulation. As a result I haven't found any damages.

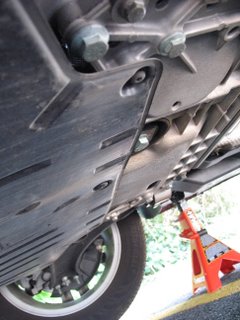
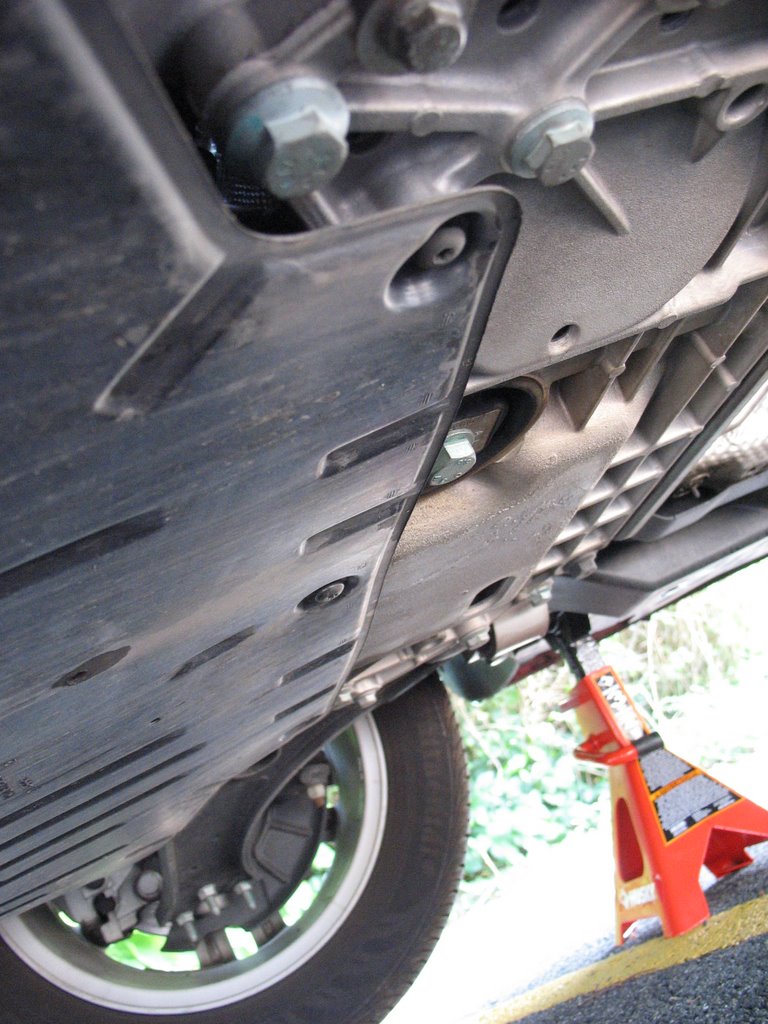
Osłona jest przymocowana 11 śrubami: po cztery z boku (Torx 20) i trzy w tylnej części (Torx 30). / The belly pan is attached with 11 bolts: four at each side (Torx T20) and three at the back (Torx T30).

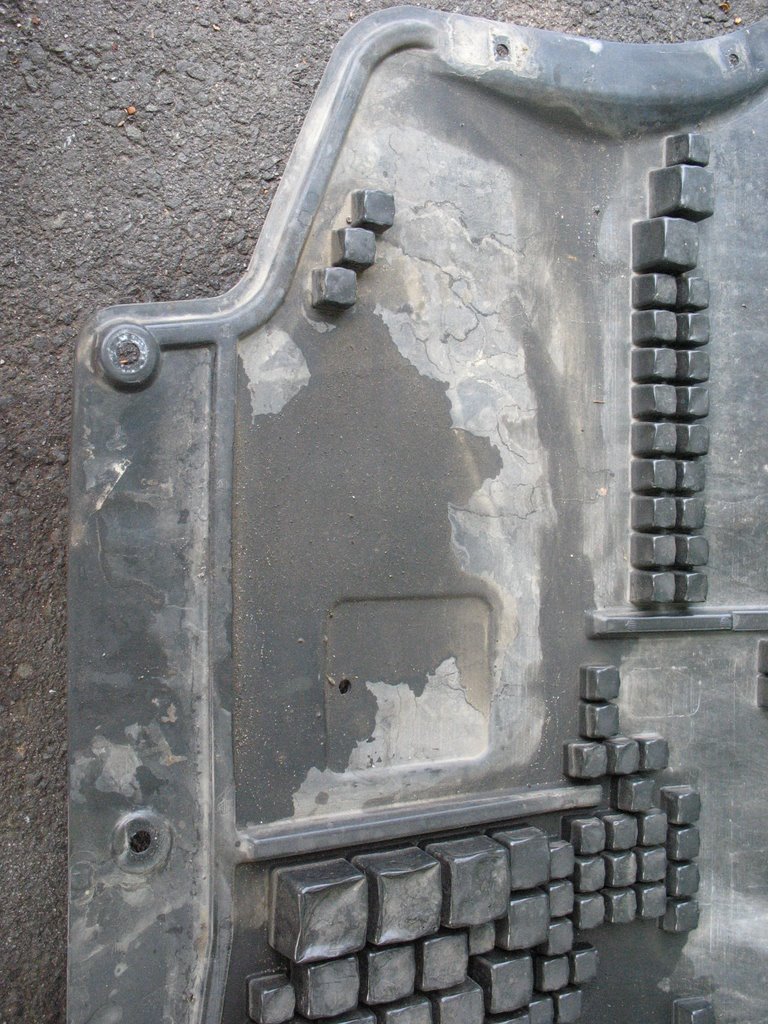
Niestety, dłuższa osłona ma też swoje wady. Nie widać czy coś cieknie. A cieknie znowu olej ze skrzyni. Skurczykoniki w serwisie się nie popisali ostatnio jak widać. Co gorsza, wydaje mi się, że nie cieknie na korq, tylko na śrubach. Trzeba będzie samochód odstawić do serwisu i bezwzględnie zażądać przedłużenia gwarancji na skrzynię.
Poprawka: Wytarłem skrzynię i tydzień później przed zawiezieniem do serwisu zajrzałem pod spód ponownie. I już sam nie wiem skąd ten olej się bierze. Skrzynia nie wygląda żeby ciekła, chyba, że od góry coś po niej spływa (płyn hamulcowy?).
---
Unfortunately, longer pan has some disadvantages as well. It is difficult to notice any leak. And in my case it was tranny leaking again. Guys at the dealership didn't do their homework well last time. What is worse it does not seem to leak through the plug. It looks more the leak is around the bolts. I plan to take the car to the dealership and definately ask for the warranty extension.
Edit: I wiped the tranny and a week later before I took it to the dealership I check the leak again. And now I am confused, as I have no clue where is the leak. Tranny does not look like it is leaking, unless sth is dripping from the top (brake fluid?)


* * *
Wymiana oleju i filtra oleju / Oil and oil filter change
Opisywałem już przy 10K. Otwieramy wlew oleju, zdejmujemy dolną osłonę, odkręcamy korek i leci.
W międzyczasie odkręciłem filtr oleju (klucz M32 albo specjalny klucz). W pudełku oprócz filtra jest nowa uszczelka pokrywy filtra, którą należy wymienić. Pozwoliłem, żeby olej spłynął, założyłem nowy filtr i dokręciłem pokrywę kluczem dynamometrycznym (25Nm).
---
I described the whole procedure at 10K. I opened the inlet, removed the pan, unbolt the plug and there was it.
In a meantime I unscrewed the oil filter cap (M32 or special tool). In the box with filter replacement I found new filter cap seal, so I replaced the old one. I let oil to drain, inserted new filter and tightened the cap to 25 Nm.


Jak już spłynie zawartość, zakręcamy korek również kluczem dynamometrycznym (30Nm). Miska olejowa jest zrobiona z alu, więc dosyć łatwo urwać gwint. Korek wymieniam za każdym razem zgodnie z instrukcją. Słyszałem że świat się nie zawali, jak się użyje starego, ale zamierzam trochę mil przejechać tym samochodem, więc wolę dmuchać na zimne. Swoją drogą ten 30Nm wydaje mi się trochę mało, ale niech im będzie. I tak niedługo planuję zajrzeć pod spód raz jeszcze więc sprawdzę czy nie cieknie.
---
Once oil was drained, I bolted the plug to 30Nm. Oil pan is made of alloy, so it is rather easy damage the thread. I replaced the plug according to the manual. It won't be end of the world to re-use it, but I plan to drive some miles with this car, so I am just careful. BTW, this 30Nm isn't much, but that's what manual says. I am going to check it again soon for any leaks.


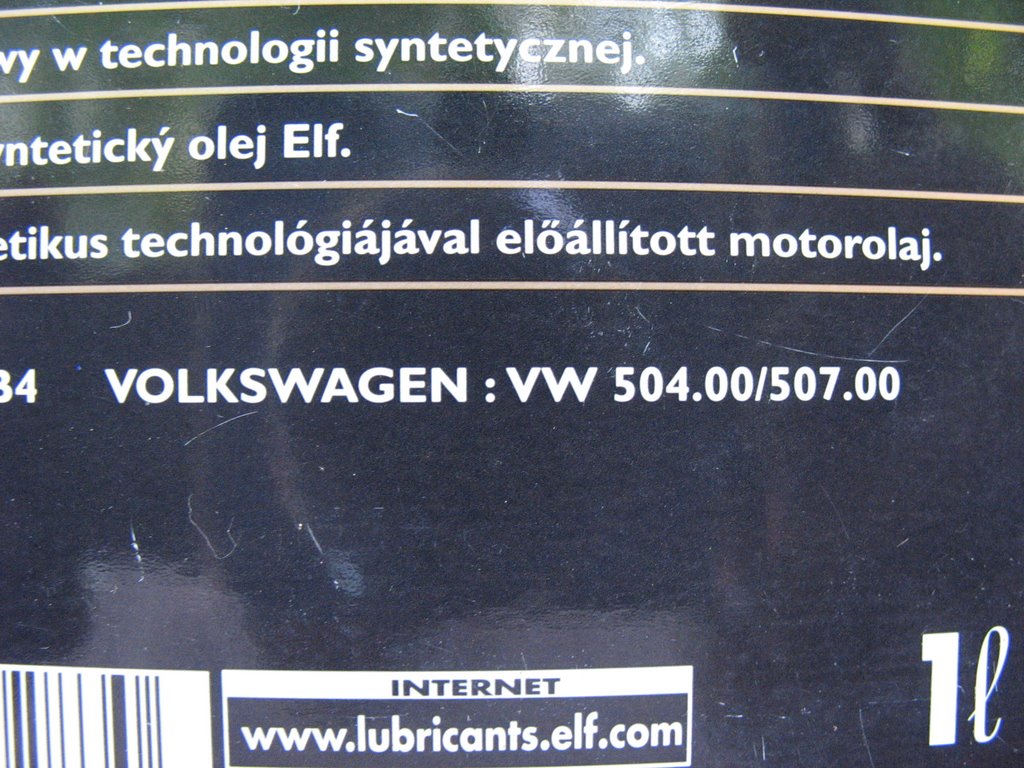
Na koniec pozostaje wlać nowy olej i sprawa załatwiona. Wlałem jak poprzednio 4.5 litra oleju Elf Solaris LLX 5w30 504.00/507.00 (pełny syntetyk). Samochód pojedzie znów 10 tysięcy mil, więc nie zamierzam się bawić w drobne oszczędności na oleju.
---
Eventually, I poured 4.5 liters of fresh oil. As last time I used Elf Solaris LLX 5w30 504.00/507.00 (fully synthetic). It is going to be another 10K miles bofore I change it, so I did not care much about some small savings on oil.
* * *
Wymiana filtra paliwa / Fuel filter change
Rocznik 2006 nie ma żadnego zaworu odpowietrznika, ani odwodnika na obudowie filtra. Wymiana filtra paliwa nie jest skomplikowana, ale jest kilka rzeczy na które trzeba zwrócić uwagę. ZALECAM OKULARY OCHRONNE! Rękawiczki też się przydadzą. I dużo szmat, żeby przykryć resztę silnika i podłożyć pod filtr. Olej napędowy źle wpływa na elementy gumowe, więc lepiej, żeby nie zostawił nam nigdzie śladów.
---
Model '06 doesn't have any drain or bleed valve on the filter cover. The change of the filter is easy, however, there are some things I wanted to point out. I STRONGLY RECOMMEND THE SAFETY GLASSES! The pair of rubber gloves is a good idea as well. And lots of rags to cover the rest of engine and put under the filter. Diesel fuel is bad for rubber, so it will be better not to leave any stains.

Do odkręcenia jest 5 śrub. Najlepiej kręcić po przekątnej, po 2-3 obroty na raz, bo uszczelka sama wypycha wieko. Potem wyciągamy filtr: ja go podważyłem z boku śrubokrętem, żeby ruszył, a potem szczypcami złapałem za kołnierz i powoli wyciągnąłem do góry. Filtr jest nałożony na trzpień i ma dwie uszczelki po stronie wewnętrznej, więc wyciąganie nie idzie tak łatwo.
Po wyjęciu trzeba opróżnik zbiornik. Najprościej odkręcić całość (2 śruby M10, 1 nakrętka M10) i wylać wszystko. Po przykręceniu z powrotem należy założyć nowy wkład i wymienić uszczelki (powinny być razem z filtrem).
Przykręcanie pokrywy podobnie jak odkręcanie: równomiernie (po 2-3 obroty) po przekątnej kluczem dynamometrycznym (5Nm).
Na koniec należałoby układ odpowietrzyć. Z tego co wiem, wystarczy włączyć zapłon bez uruchamiania samego silnika na kilka minut, a pompa paliwa sama zadba o uzupełnienie paliwa w filtrze.
---
It is 5 bolts to unscrew. The best way is to turn 2-3 revs at the time and then switch to the opposite bolt, as the seal pushes the cover up. Next thing is to remove the filter: I pried it a bit with a screwdriver and then used pliers to grab it by the collar and slowly pull up. There are two seals inside the filter, so it wasn't easy to pull it up gently.
Next step is to empty the container. The easiest way is to remove it (2 bolts M10 and 1 nut M10) and pour our everything. After re-installation, insert new filter and replace the seals (they should be in the box with the filter).
Installation of the cover in the same way as described above: 2-3 revs at the time and switching to opposite bolt, then tightening the bolts to 4 ft-lbs.
Last thing to do is to bleed the filter. As far as I know it is enough to turn on the ignition without cranking the engine for few minutes and the fuel pump will do the job.
* * *
Wymiana filtra przeciwpyłkowego / Cabin pollen filter change
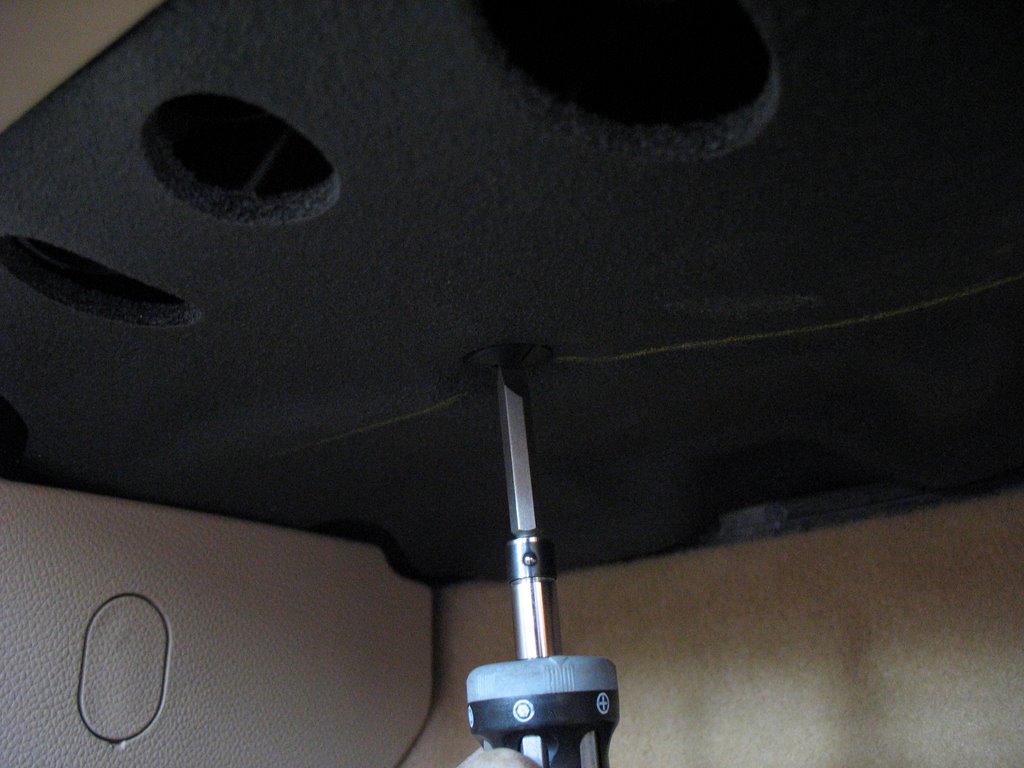
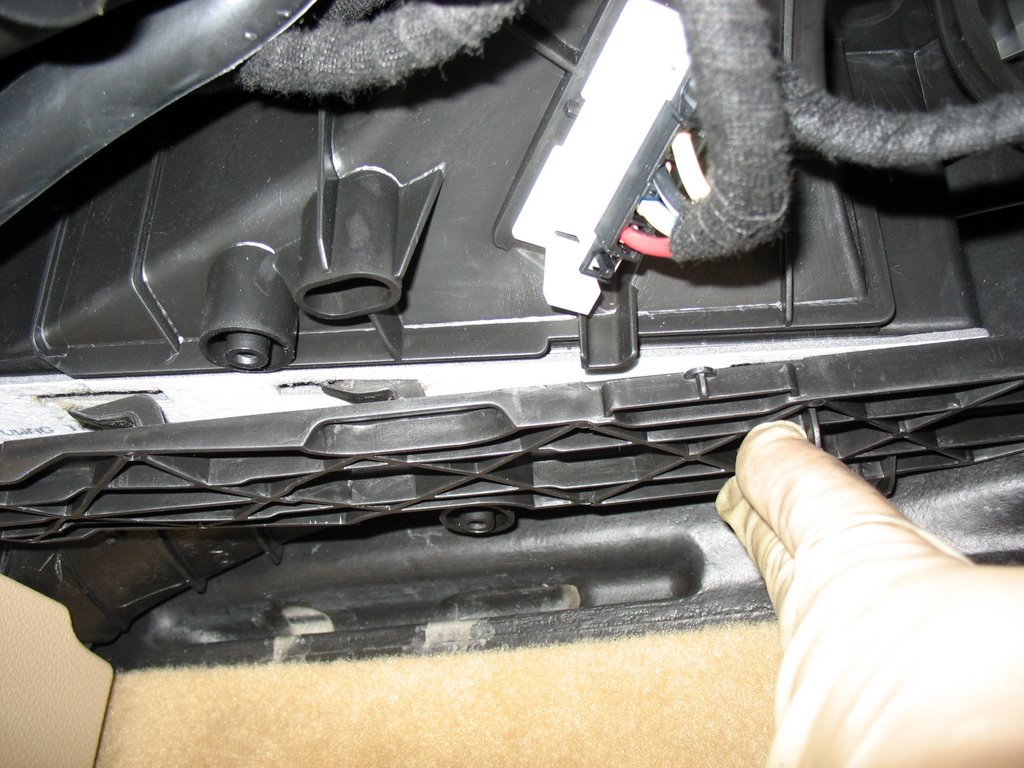
Filtr jest w kabinie po stronie pasażera za schowkiem. Dostęp od dołu. Do odkręcenia są dwie śruby plastikowe, żeby zdjąć piankową osłonę. Potem trzeba przesunąć pokrywę w prawo i mamy dostęp do filtra.
---
This filter is located inside on the passenger side behind the glove box and it is accessible from the footwell compartment, unscrewing 2 plastic bolts and removing the foam cover. The filter is located under the cover, that needs to be slid to the right for removal.


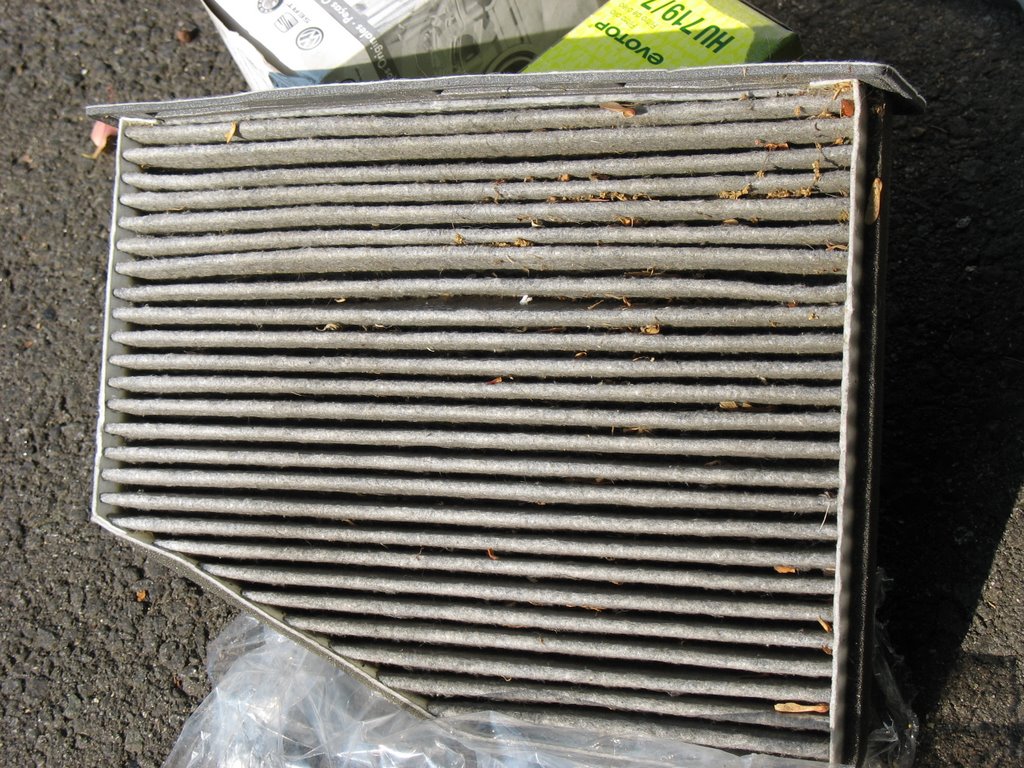
Jak widać trochę liści i innego badziewia się zebrało na filtrze. / As it can be seen there ware some leaves and other dust inside.

Przed włożeniem nowego filtra warto odkurzyć komorę, albo przynajmniej wyciągnąć rękami resztki ze środka. Wkładamy nowy filtr stroną sciętą w prawo, zasuwamy pokrywę (w prawo), przykręcamy piankową osłonę i po zawodach.
---
It is a good idea to vacuum the filter chamber before installing a new filter. The cut part is supposed to be inserted on the right side. Last thing to do is to install the filter cover, and bolt the foam cover and we are done.

Na koniec zostało tylko przełożyć opony i przegląd zrobiony.
---
Finally, I rotated tires and the service was done.
Tym razem poszedłem po rozum do głowy i poluzowałem śruby od kół, zanim jeszcze podniosłem samochód do zmiany oleju :-). Przydało się przy przekładce kół.
Ponieważ w naszej ostatniej podróży po Stanach przejechaliśmy po pozostałościach z opony ciężarówki byłem ciekawy czy nie ma żadnych uszkodzeń od spodu. Na szczęście VW z silnikami TDI mają dosyć pancerne zabezpieczenie od spodu (dłuższe niż benzyniaki, przynajmniej tak było w Mk4), którego zadaniem jest również tłumienie hałasu. W związku z tym nie zauważyłem żadnych uszkodzeń.
---
Last weekend I did my 20k miles maintenance service in Swonick: oil change, oil filter change, fuel filter change, pollen cabin filter change and wheel rotation.
This time I was wiser and I loosen the wheel bolts before I lift the car for oil change :-). Good idea if you plan the wheel rotation.
During our last trip around US we drove over the piece of truck tyre left on the road, so I was curious if there were any damages. Fortunately, TDIs are equipped with the big stron belly pan (bigger then in gassers, at least in Mk4), whish is also responsible for noise insulation. As a result I haven't found any damages.
Osłona jest przymocowana 11 śrubami: po cztery z boku (Torx 20) i trzy w tylnej części (Torx 30). / The belly pan is attached with 11 bolts: four at each side (Torx T20) and three at the back (Torx T30).

Niestety, dłuższa osłona ma też swoje wady. Nie widać czy coś cieknie. A cieknie znowu olej ze skrzyni. Skurczykoniki w serwisie się nie popisali ostatnio jak widać. Co gorsza, wydaje mi się, że nie cieknie na korq, tylko na śrubach. Trzeba będzie samochód odstawić do serwisu i bezwzględnie zażądać przedłużenia gwarancji na skrzynię.
Poprawka: Wytarłem skrzynię i tydzień później przed zawiezieniem do serwisu zajrzałem pod spód ponownie. I już sam nie wiem skąd ten olej się bierze. Skrzynia nie wygląda żeby ciekła, chyba, że od góry coś po niej spływa (płyn hamulcowy?).
---
Unfortunately, longer pan has some disadvantages as well. It is difficult to notice any leak. And in my case it was tranny leaking again. Guys at the dealership didn't do their homework well last time. What is worse it does not seem to leak through the plug. It looks more the leak is around the bolts. I plan to take the car to the dealership and definately ask for the warranty extension.
Edit: I wiped the tranny and a week later before I took it to the dealership I check the leak again. And now I am confused, as I have no clue where is the leak. Tranny does not look like it is leaking, unless sth is dripping from the top (brake fluid?)

Wymiana oleju i filtra oleju / Oil and oil filter change
Opisywałem już przy 10K. Otwieramy wlew oleju, zdejmujemy dolną osłonę, odkręcamy korek i leci.
W międzyczasie odkręciłem filtr oleju (klucz M32 albo specjalny klucz). W pudełku oprócz filtra jest nowa uszczelka pokrywy filtra, którą należy wymienić. Pozwoliłem, żeby olej spłynął, założyłem nowy filtr i dokręciłem pokrywę kluczem dynamometrycznym (25Nm).
---
I described the whole procedure at 10K. I opened the inlet, removed the pan, unbolt the plug and there was it.
In a meantime I unscrewed the oil filter cap (M32 or special tool). In the box with filter replacement I found new filter cap seal, so I replaced the old one. I let oil to drain, inserted new filter and tightened the cap to 25 Nm.


Jak już spłynie zawartość, zakręcamy korek również kluczem dynamometrycznym (30Nm). Miska olejowa jest zrobiona z alu, więc dosyć łatwo urwać gwint. Korek wymieniam za każdym razem zgodnie z instrukcją. Słyszałem że świat się nie zawali, jak się użyje starego, ale zamierzam trochę mil przejechać tym samochodem, więc wolę dmuchać na zimne. Swoją drogą ten 30Nm wydaje mi się trochę mało, ale niech im będzie. I tak niedługo planuję zajrzeć pod spód raz jeszcze więc sprawdzę czy nie cieknie.
---
Once oil was drained, I bolted the plug to 30Nm. Oil pan is made of alloy, so it is rather easy damage the thread. I replaced the plug according to the manual. It won't be end of the world to re-use it, but I plan to drive some miles with this car, so I am just careful. BTW, this 30Nm isn't much, but that's what manual says. I am going to check it again soon for any leaks.

Na koniec pozostaje wlać nowy olej i sprawa załatwiona. Wlałem jak poprzednio 4.5 litra oleju Elf Solaris LLX 5w30 504.00/507.00 (pełny syntetyk). Samochód pojedzie znów 10 tysięcy mil, więc nie zamierzam się bawić w drobne oszczędności na oleju.
---
Eventually, I poured 4.5 liters of fresh oil. As last time I used Elf Solaris LLX 5w30 504.00/507.00 (fully synthetic). It is going to be another 10K miles bofore I change it, so I did not care much about some small savings on oil.
Wymiana filtra paliwa / Fuel filter change
Rocznik 2006 nie ma żadnego zaworu odpowietrznika, ani odwodnika na obudowie filtra. Wymiana filtra paliwa nie jest skomplikowana, ale jest kilka rzeczy na które trzeba zwrócić uwagę. ZALECAM OKULARY OCHRONNE! Rękawiczki też się przydadzą. I dużo szmat, żeby przykryć resztę silnika i podłożyć pod filtr. Olej napędowy źle wpływa na elementy gumowe, więc lepiej, żeby nie zostawił nam nigdzie śladów.
---
Model '06 doesn't have any drain or bleed valve on the filter cover. The change of the filter is easy, however, there are some things I wanted to point out. I STRONGLY RECOMMEND THE SAFETY GLASSES! The pair of rubber gloves is a good idea as well. And lots of rags to cover the rest of engine and put under the filter. Diesel fuel is bad for rubber, so it will be better not to leave any stains.

Do odkręcenia jest 5 śrub. Najlepiej kręcić po przekątnej, po 2-3 obroty na raz, bo uszczelka sama wypycha wieko. Potem wyciągamy filtr: ja go podważyłem z boku śrubokrętem, żeby ruszył, a potem szczypcami złapałem za kołnierz i powoli wyciągnąłem do góry. Filtr jest nałożony na trzpień i ma dwie uszczelki po stronie wewnętrznej, więc wyciąganie nie idzie tak łatwo.
Po wyjęciu trzeba opróżnik zbiornik. Najprościej odkręcić całość (2 śruby M10, 1 nakrętka M10) i wylać wszystko. Po przykręceniu z powrotem należy założyć nowy wkład i wymienić uszczelki (powinny być razem z filtrem).
Przykręcanie pokrywy podobnie jak odkręcanie: równomiernie (po 2-3 obroty) po przekątnej kluczem dynamometrycznym (5Nm).
Na koniec należałoby układ odpowietrzyć. Z tego co wiem, wystarczy włączyć zapłon bez uruchamiania samego silnika na kilka minut, a pompa paliwa sama zadba o uzupełnienie paliwa w filtrze.
---
It is 5 bolts to unscrew. The best way is to turn 2-3 revs at the time and then switch to the opposite bolt, as the seal pushes the cover up. Next thing is to remove the filter: I pried it a bit with a screwdriver and then used pliers to grab it by the collar and slowly pull up. There are two seals inside the filter, so it wasn't easy to pull it up gently.
Next step is to empty the container. The easiest way is to remove it (2 bolts M10 and 1 nut M10) and pour our everything. After re-installation, insert new filter and replace the seals (they should be in the box with the filter).
Installation of the cover in the same way as described above: 2-3 revs at the time and switching to opposite bolt, then tightening the bolts to 4 ft-lbs.
Last thing to do is to bleed the filter. As far as I know it is enough to turn on the ignition without cranking the engine for few minutes and the fuel pump will do the job.
Wymiana filtra przeciwpyłkowego / Cabin pollen filter change
Filtr jest w kabinie po stronie pasażera za schowkiem. Dostęp od dołu. Do odkręcenia są dwie śruby plastikowe, żeby zdjąć piankową osłonę. Potem trzeba przesunąć pokrywę w prawo i mamy dostęp do filtra.
---
This filter is located inside on the passenger side behind the glove box and it is accessible from the footwell compartment, unscrewing 2 plastic bolts and removing the foam cover. The filter is located under the cover, that needs to be slid to the right for removal.


Jak widać trochę liści i innego badziewia się zebrało na filtrze. / As it can be seen there ware some leaves and other dust inside.
Przed włożeniem nowego filtra warto odkurzyć komorę, albo przynajmniej wyciągnąć rękami resztki ze środka. Wkładamy nowy filtr stroną sciętą w prawo, zasuwamy pokrywę (w prawo), przykręcamy piankową osłonę i po zawodach.
---
It is a good idea to vacuum the filter chamber before installing a new filter. The cut part is supposed to be inserted on the right side. Last thing to do is to install the filter cover, and bolt the foam cover and we are done.

Na koniec zostało tylko przełożyć opony i przegląd zrobiony.
---
Finally, I rotated tires and the service was done.
Wujek Zdzisek z Ameryki wysłał o / posted at 8:58 PM
komentarzy / comments: 0
![]()
![]()
Prześlij komentarz
<< Powrót / Close