Wczoraj instalowałem
sprężyny. Dzisiaj mam takie zakwasy, że ledwo się ruszam. Pod koniec tygodnia jadę na ustawienie zbieżności, a w weekend zakładam
nowe koła i wrzucę zdjęcia z instalacji.
---
Yesterday I installed
springs. Today every muscle of mine hurts as hell. At the end of the week I am going for the wheel alignment and next weekend I will put
new wheels and post few pics from installation.
Potrzebne narzędzia / Tools required:
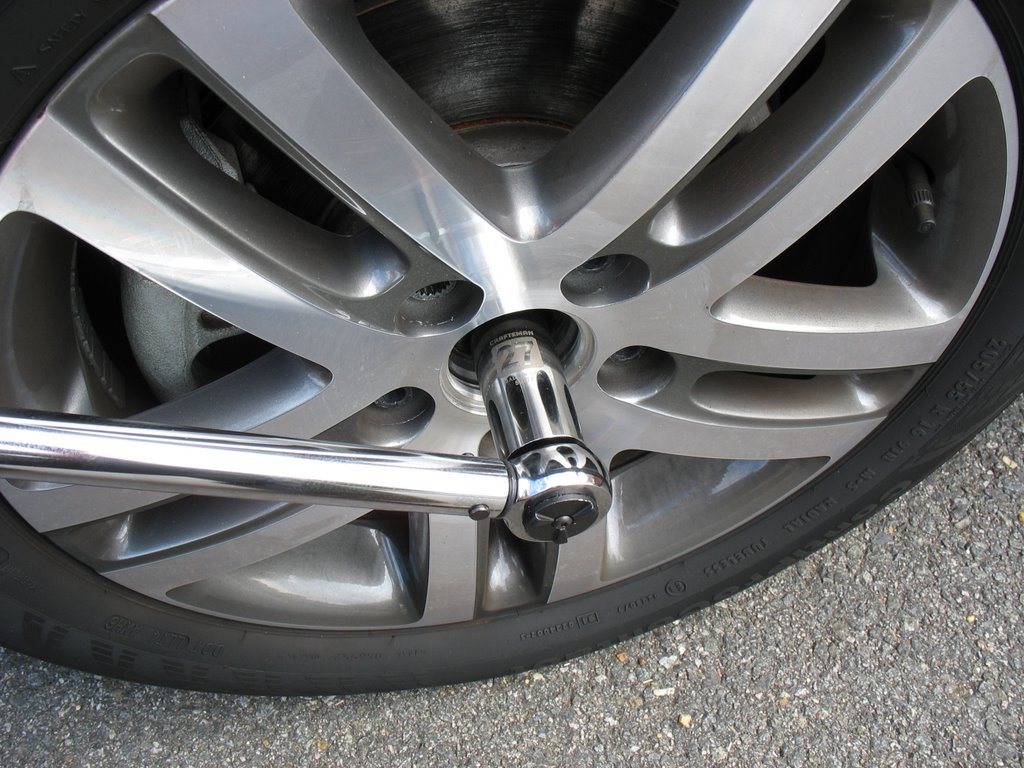
1. Nasadka M27 (do odkręcenia śrub półosi) / Socket M27 (to unbolt the axle bolts)
2. Klucz dynamometryczny (do 200Nm) / Torque wrench (up to 200Nm)
3. Nasadki: M18, M16 (koniecznie długa) / Sockets: M18, M16 (deep)
4. Nasadka dwunastopunktowa M14 / Triple Square Socket M14
5. Rozpieracz do zwrotnicy / Strut spreader
6. Klucz przelotowy M21/M22 / Wrench M21/M22 with a hole through
7. Nasadka Allen M7 z przedłużką / Allen Socket M7 with extension
8. Nasadka M13 / Socket M13
9. Podpórki/stojaki do samochodu / Jack stands
10. Podnośnik hydrauliczny / Hydraulic jack
11. Kawałek linki do podwieszenia wyjętej półosi / Bungee rope to hang the unbolted drive axle
12. Klucze płaskie i nasadkowe różnych rozmiarów / Bunch of wrenches and sockets of various sizes
13. Gumowy młotek / Rubber mallet

Przed podniesieniem samochodu poluzować śruby kół (M17) i śruby półosi (M27), ale tylko poluzować, bo można załawić łożyska. / With the car still on the ground, loosen all the wheel lugs (M17) and axle bolts (M27), but make sure to just loosen to avoid damaging bearings.
Podnieść samochód, postawić na podpórkach, zdjąć koła. / Raise the car, support with stands, remove wheels.
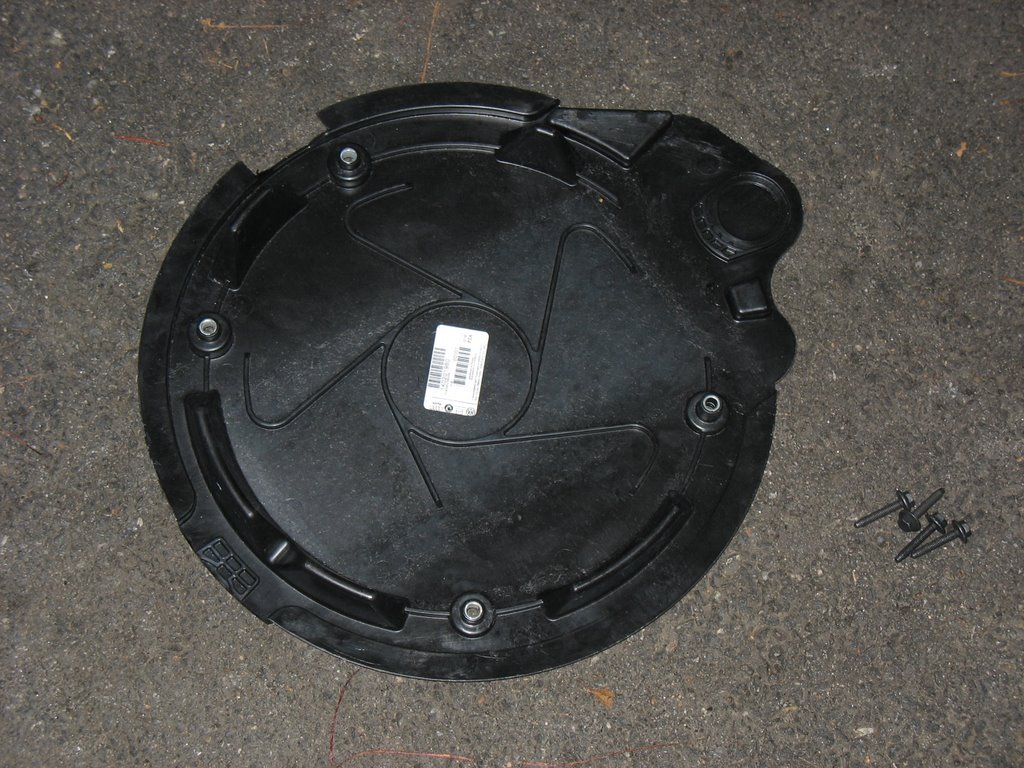
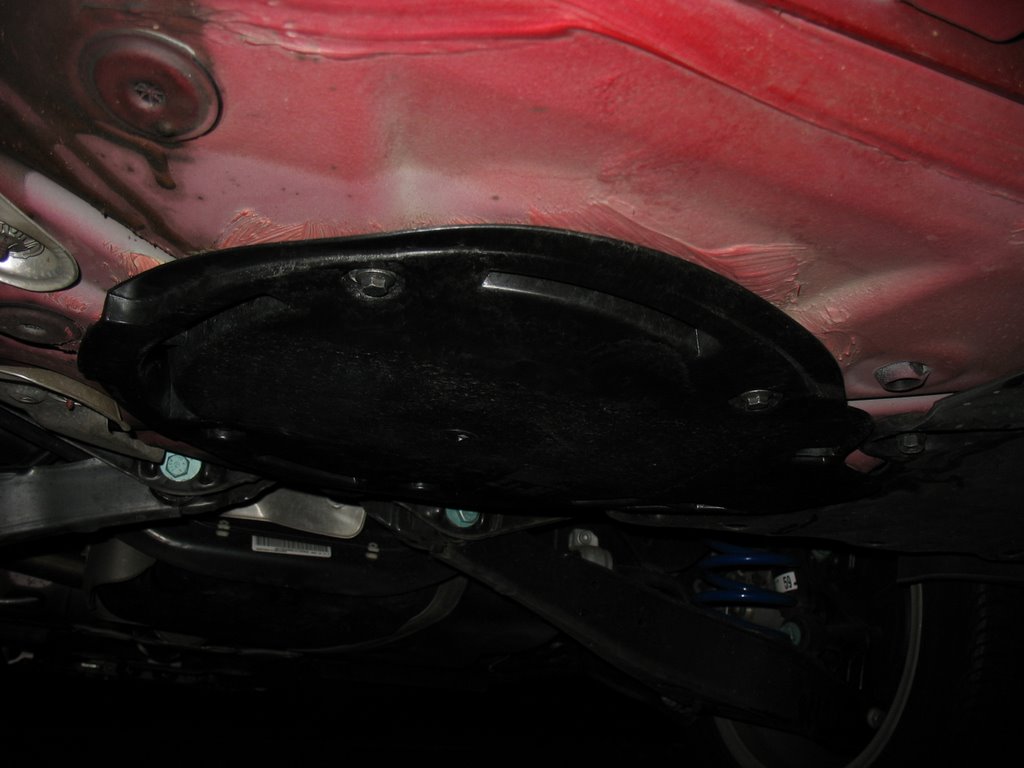
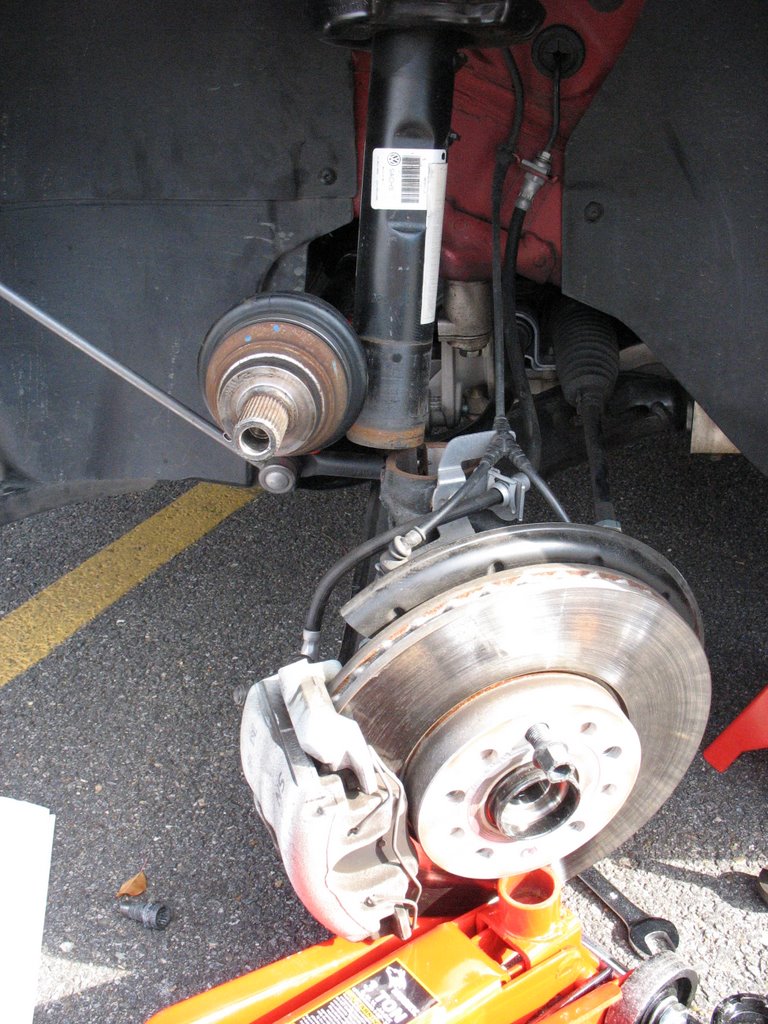
Przód / FrontNie mam (jeszcze) zainstalowanych xenonów, więc odpadło mi odkręcanie czujników samopoziomujących. / I don't have HIDs installed (yet), so I did not have to worry about removing the auto-leveling sensors.Odpiąć kable czujników ABS i grubości okładzin. / Unplug the wires of ABS and pads sensors.

Odkręcić łącznik stabilizatora przy amortyzatorze (M18). / Unbolt the stabilizer link on the shock absorber (M18).

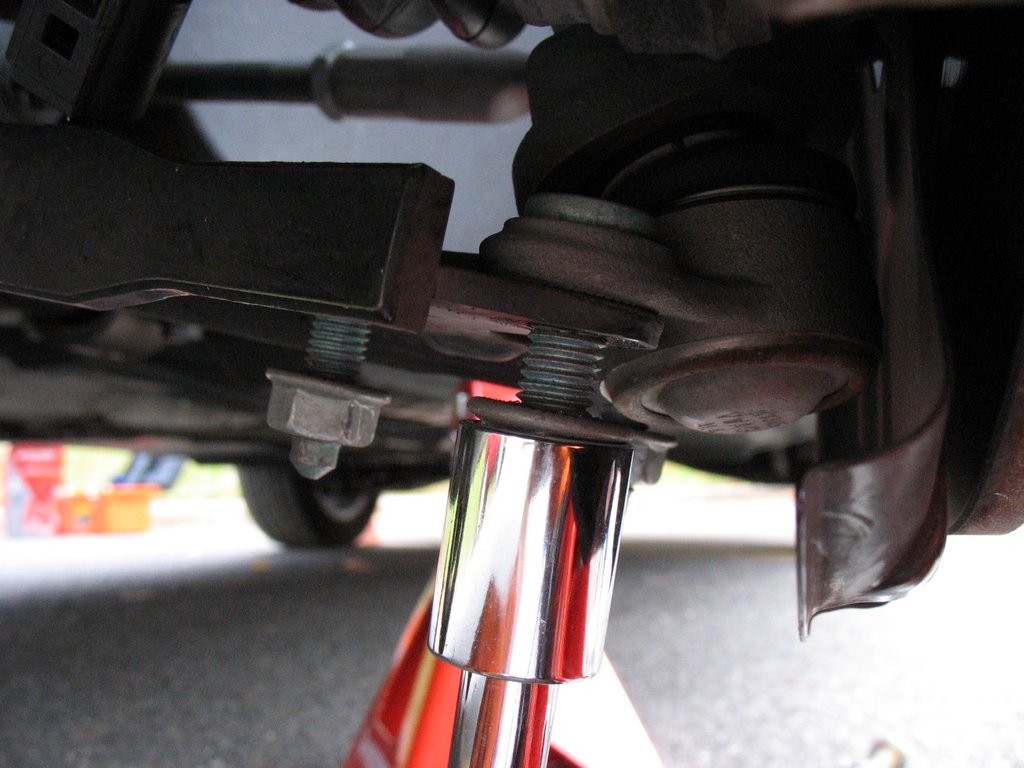
Odkręcić śrubę ściskającą amortyzator w zwrotnicy (śruba M14 dwanaściepunktów + nakrętka M18). / Unbolt bolt pinching shock absorber in the wheel bearing housing (triple square M14 bolt + M18 nut).

Odkręcić trzy śruby mocujące przegub kulisty to wahacza (M16). / Unbolt 3 bolts keeping ball joint to the control arm (M16).
Do przykręcenia potrzebny jest długi/głęboki klucz. / To bolt it back the deep socket is needed.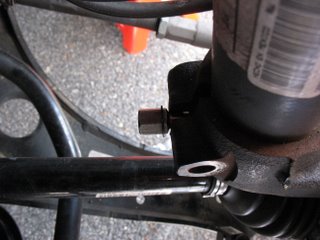
Włożyć rozpieracz w szczelinę z zwrotnicy i przekręcić o 90 stopni. / Insert strut spreader in the gap in the wheel bearing housing and turn 90 degrees.

Wykręcić śrubę półosi (może się przydać asystent do przytrzymania hamulca), wyjąć zwrotnicę z wahacza, wyjąć półoś z łożyska, podeprzeć/zawiesić półoś, opuścić zwrotnicę i wyjąć amortyzator, podeprzeć zwrotnicę. Uff... :-). / Remove the axle bolt (an assistant might be useful to press brake pedal), remove wheel bearing housing from control arm, remove axle from bearing, support/hang axle, lower wheel bearing housing and remove shock absorber, support wheel bearing housing. Gee... :-).
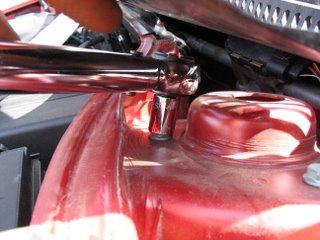
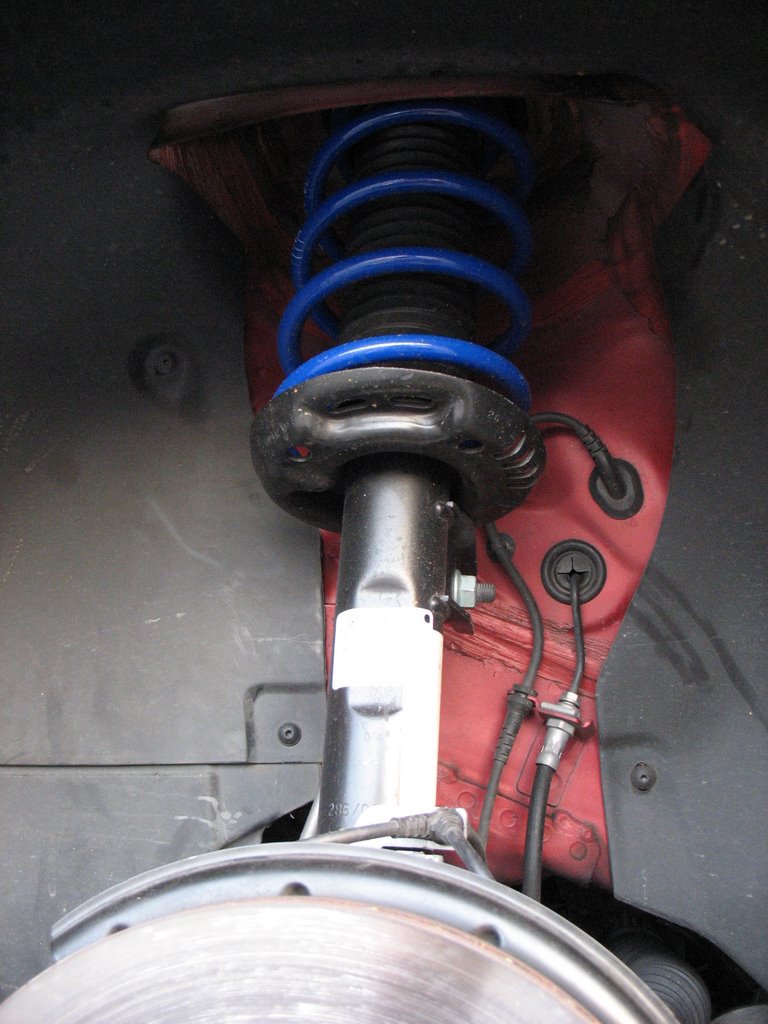
Odkręcić wycieraczki (M13) zaznaczając wcześniej ich pozycję na szybię (np. kredą, albo kawałkiem taśmy klejącej). Podnieść osłonę pod szybą i odkręcić trzy śruby (M13) mocujące amortyzator do nadwozia. Przy odkręcaniu ostatniej podtrzymać amortyzator, żeby nie spadł na ziemię. / Remove wipers (M13) making sure their position on the windshield is marked (with chalk or piece of scotch tape). Raise the plastic tray under windshield and remove three bolts (M13) keeping the shock absorber to body. While removing the third one, grab the shock not to allow it to fall down.

Po wyjęciu amortyzatora, założyć ściskacz do sprężyn i ścisnąć sprężynę, aż łożyskowanie kolumny amortyzatora będzie się swobodnie ruszać. Odkręcić nakrętkę mocującą łożyskowanie do amortyzatora przy pomocy klucza oczkowego M21 i klucza Allena M7. / After removal of shock absorber, attach the spring compressor and compress the spring until the suspension strut storage can move freely. Unbolt the nut keeping the suspension strut storage using M21 wrench with a hole and Allen M7 socket.

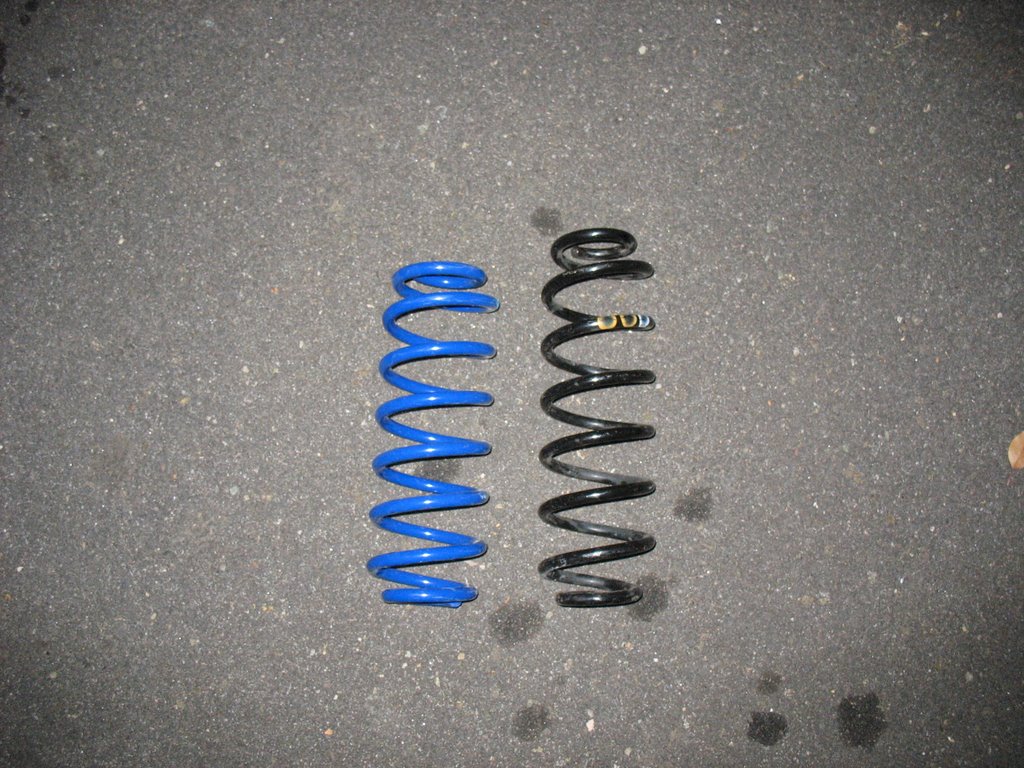
A tutaj porówanie sprężyn. / And here are two springs compared.
Montaż / AssemblyOczywiście w odwrotnej kolejności z kilkoma uwagami: / Of course in reverse order with few comments:
1. Przy zakładaniu sprężyny należy zwrócić uwagę na dokładne osadzenie ich w dolnych podkładkach. / During installing springs it is necessary to pay attention to how they are settled in the lower buffer blocks.
2. Łożyskowanie amortyzatora ma strzałki wskazujące przód i tył pojazdu. Należy o tym pamiętać przy montażu. / The suspension strut storage has arrows embossed showing front and rear of the vehicle. It is important to assembly it right.
3. Instrukcja zaleca wymianę śrub i nakrętek na nowe. Poniżej lista śrub i nakrętek, które wymieniłem. / The repair manual suggests to replace the unbolted nuts and bolts with new ones. Below is the list of bolts and nuts I have replaced.
4. Wszystkie śruby i nakrętki muszą byś dokręcone odpowiednim momentem obrotowym. Poniżej lista. / All bolts and nuts must be tighten with the appropriate torque. The list is below.
5. Śruby półosi należy dokręcić do 200Nm, kiedy samochód jest uniesiony, a po opuszczeniu dokręcić o kolejne 180 stopni (pół obrotu) / Axle bolts must be tighten to 200Nm when the car is raised, and another 180 degrees (half rev) with the car on the ground.
6. Warto zaznaczyć kreskę na śrubach które muszą być dokręcone o kolejne ćwierć czy pół obrotu - łatwiej trzymać orientację. / It is good to mark the line on the bolts that need to be tighten by another quarter or half of rev to keep the orientation.
Nr części
Part no. | Typ
Type | Ilość
Amount | Lokalizacja
Location | Nm |
| N-015-081-4 | M12x1.5 | 2 | Łącznik stabilizatora do amortyzatora
Stabilizer link 2 shock | 65 |
| N-101-064-02 | M12x1.5 | 2 | Amortyzator do zwrotnicy
Shock absorber 2 bearing housing | 70 + 90 stopni/degree |
| N-103-320-01 | M10 | 6 | Przegub kulowy do wahacza
Ball joint 2 control arm | 60 |
| N-910-406-01 | M16x1.5x80x61 | 2 | Półoś do łożyska
Drive axle 2 ball bearing | 200 + 180 stopni/degree |
| N-910-216-01 | M14x1.5 | 2 | Amortyzator do łożyskowania kolumny
Shock absorber 2 strut storage | 60 |
| N-101-277-06 | M8x26 | 6 | Łożyskowanie kolumny do nadwozia
Strut storage 2 body | 15 + 90 stopni/degree |
 Nowa sprężyna na miejscu / New spring installed
 Przed / Before
 Po / AfterTył / RearBentley zaleca założenie kompresora do sprężyn, ściśnięcie sprężyn i wyjęcie ich z samochodu. Konia z rzędem temu, kto zrobi to przy pomocy taniego, dwustronnego kompresora. Noc mnie zastała przy próbach ściśnięcia tylnej sprężyny. W końcu się wnerwiłem i wymieniłem sprężynę inaczej. / Bentley suggests to compress the rear spring in order to remove it from the car. Well, I spent few hours trying to use cheap two-side spring compressor to do it without success. Eventually, I decided to replace the springs in a different way.
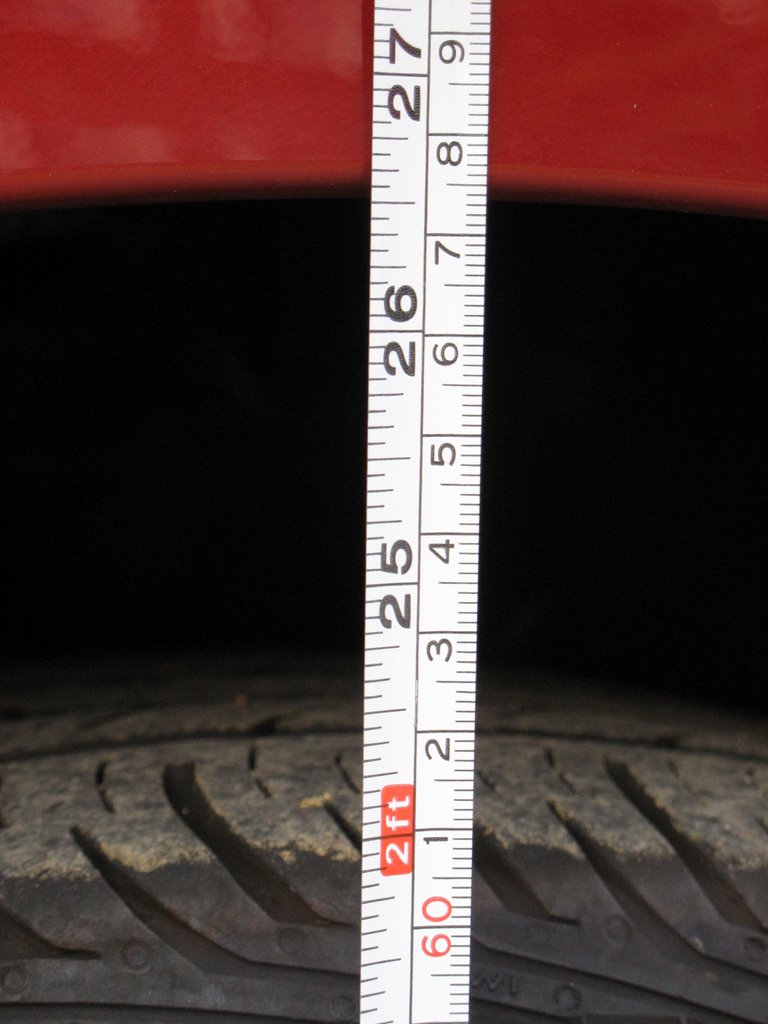
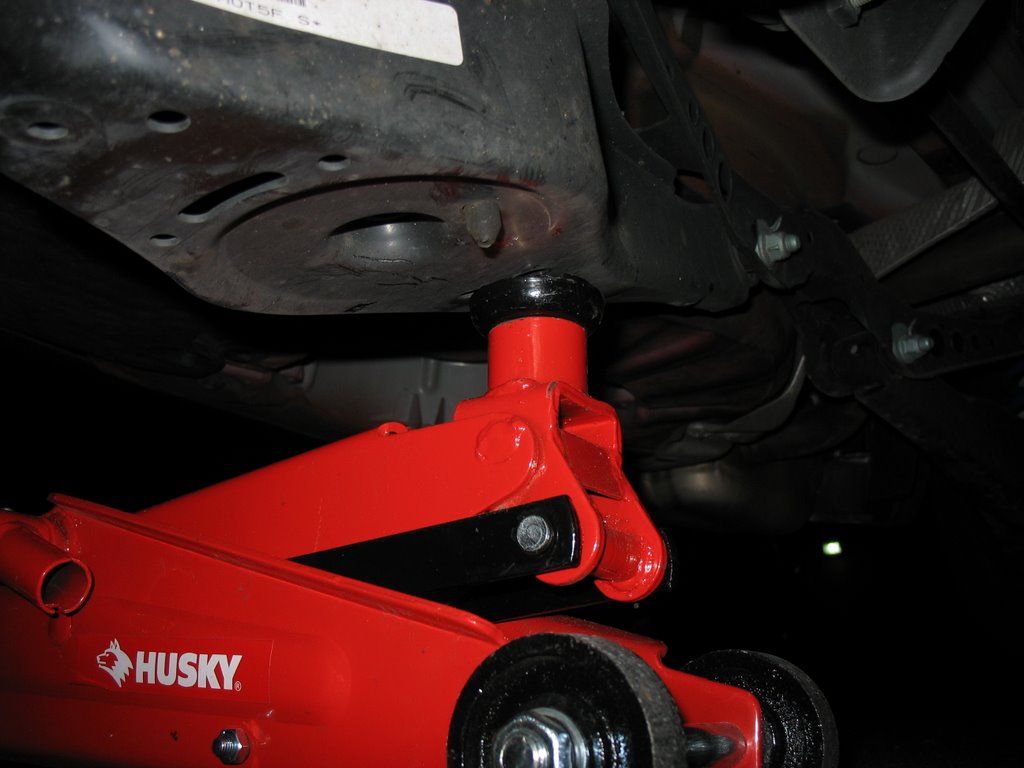
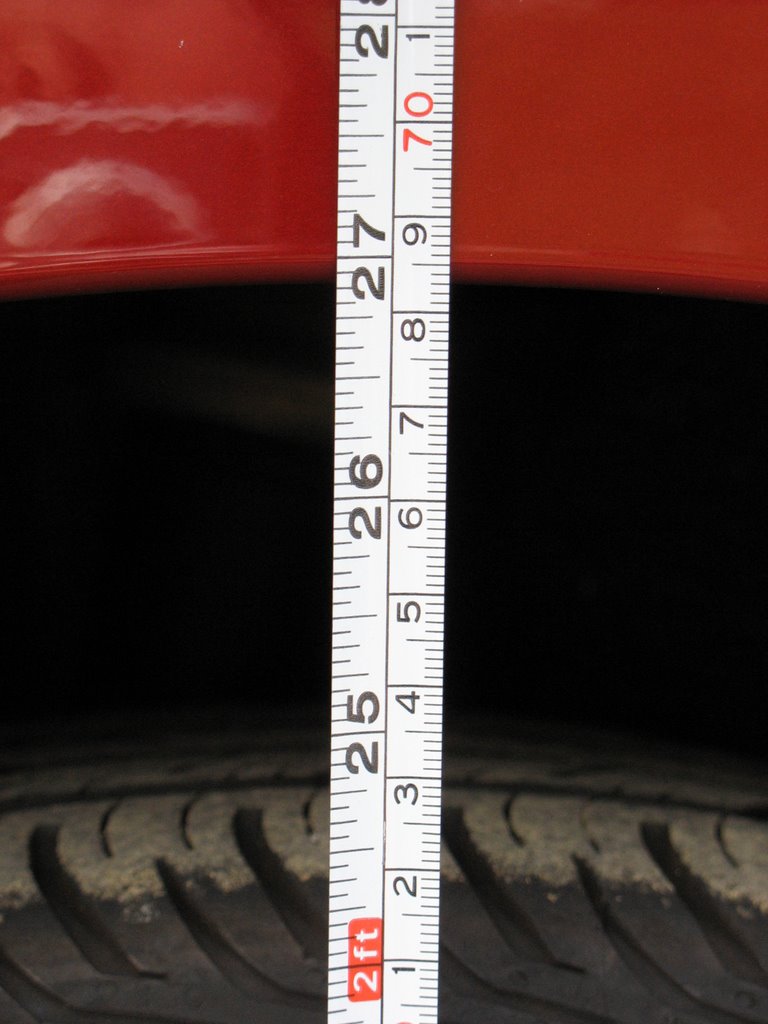
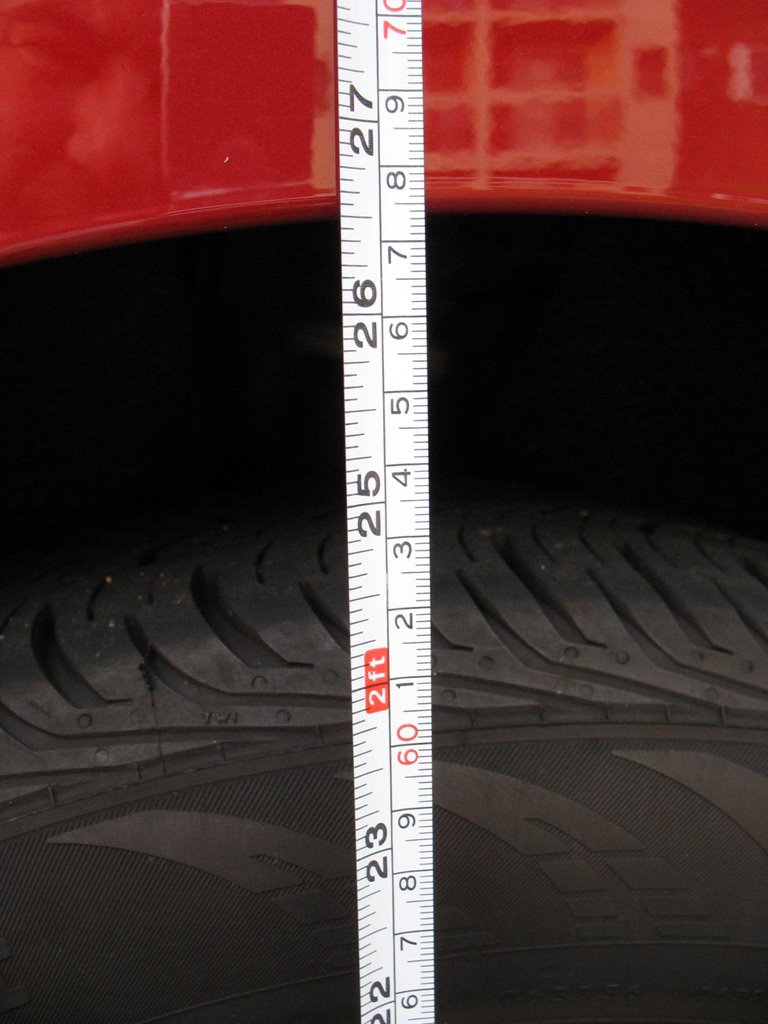
Podeprzeć dolny wahacz podnośnikiem hydraulicznym. W wahaczu są dwa otwory, które można wykorzystać do zazębienia podnośnika. Podnieść wahacz do góry, tak by oś koła znalazła się w odległości 354mm od błotnika. / Support lower transverse link with the hydraulic jack. There are two narrow holes in the link that can be used to hook the jack. Raise the link up, until the wheel axle will be 14in from the fender.

Odkręcić śrubę mocującą dolny wahacz do zwrotnicy (nasadka M18 + płaski klucz M18). Opuścić wahacz, wyjąć sprężynę. / Remove the bolt keeping lower control arm and wheel bearing housing together (M18 socket + M18 wrench). Lower the arm and remove the spring.

A tutaj porówanie sprężyn. / And here are two springs compared.
Montaż / AssemblyOdwrotna kolejność. Uwagi jak wyżej: / Reverse order. Comments as above:
Nr części
Part no. | Typ
Type | Ilość
Amount | Lokalizacja
Location | Nm |
N-106-286-01
N-101-064-02 | M12x1.5x75
M12x1.5 | 2
2 | Wahacz do zwrotnicy
Lower control arm 2 wheel bearing housing | 90 + 90 stopni/degree |
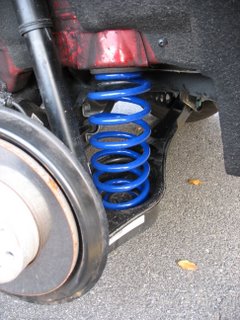 Nowa sprężyna na miejscu / New spring installed
 Przed / Before
 Po / After
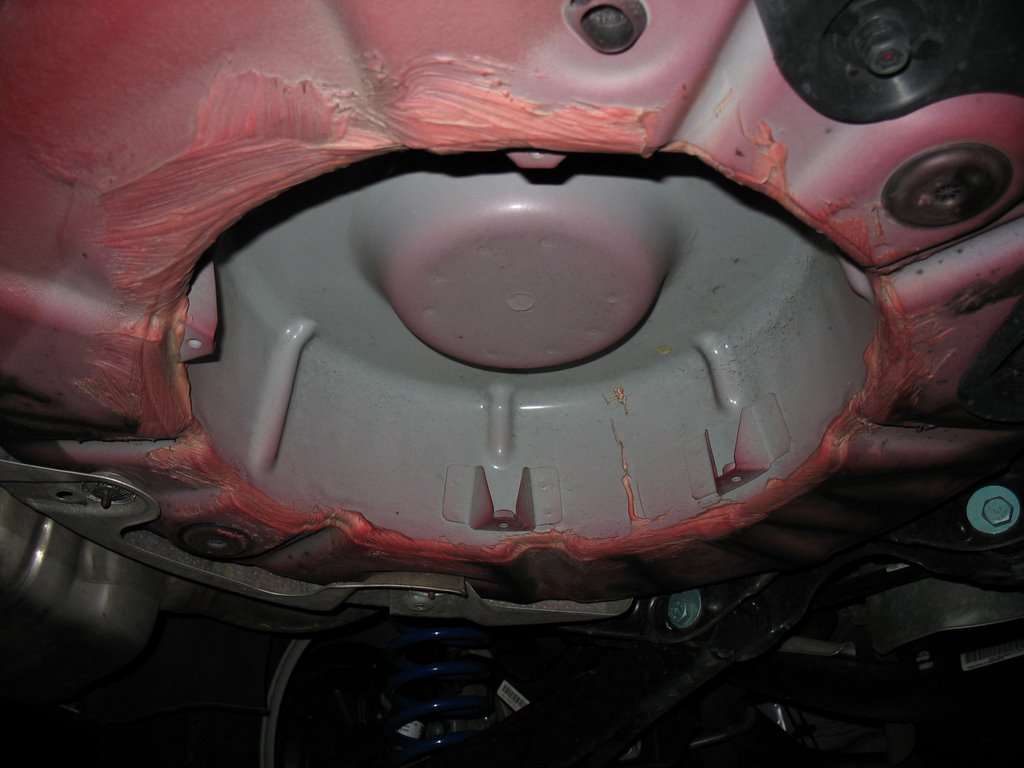
 Po ustawieniu zbieżności / After wheel alignment


Prześlij komentarz
<< Powrót / Close